Log in to the dashboard
The dashboard is generally installed on the controller node.
Ask the cloud operator for the host name or public IP address from which you can access the dashboard, and for your user name and password. If the cloud supports multi-domain model, you also need to ask for your domain name.
Open a web browser that has JavaScript and cookies enabled.
Note
To use the Virtual Network Computing (VNC) client for the dashboard, your browser must support HTML5 Canvas and HTML5 WebSockets. The VNC client is based on noVNC. For details, see noVNC: HTML5 VNC Client. For a list of supported browsers, see Browser support.
In the address bar, enter the host name or IP address for the dashboard, for example,
https://ipAddressOrHostName/.Note
If a certificate warning appears when you try to access the URL for the first time, a self-signed certificate is in use, which is not considered trustworthy by default. Verify the certificate or add an exception in the browser to bypass the warning.
On the Log In page, enter your user name and password, and click Sign In. If the cloud supports multi-domain model, you also need to enter your domain name.
The top of the window displays your user name. You can also access the Settings tab (OpenStack dashboard — Settings tab) or sign out of the dashboard.
The visible tabs and functions in the dashboard depend on the access permissions, or roles, of the user you are logged in as.
If you are logged in as an end user, the Project tab (OpenStack dashboard — Project tab) and Identity tab (OpenStack dashboard — Identity tab) are displayed.
If you are logged in as an administrator, the Project tab (OpenStack dashboard — Project tab) and Admin tab (OpenStack dashboard — Admin tab) and Identity tab (OpenStack dashboard — Identity tab) are displayed.
OpenStack dashboard — Project tab
Projects are organizational units in the cloud and are also known as tenants or accounts. Each user is a member of one or more projects. Within a project, a user creates and manages instances.
From the Project tab, you can view and manage the resources in a selected project, including instances and images. You can select the project from the drop-down menu at the top left. If the cloud supports multi-domain model, you can also select the domain from this menu.
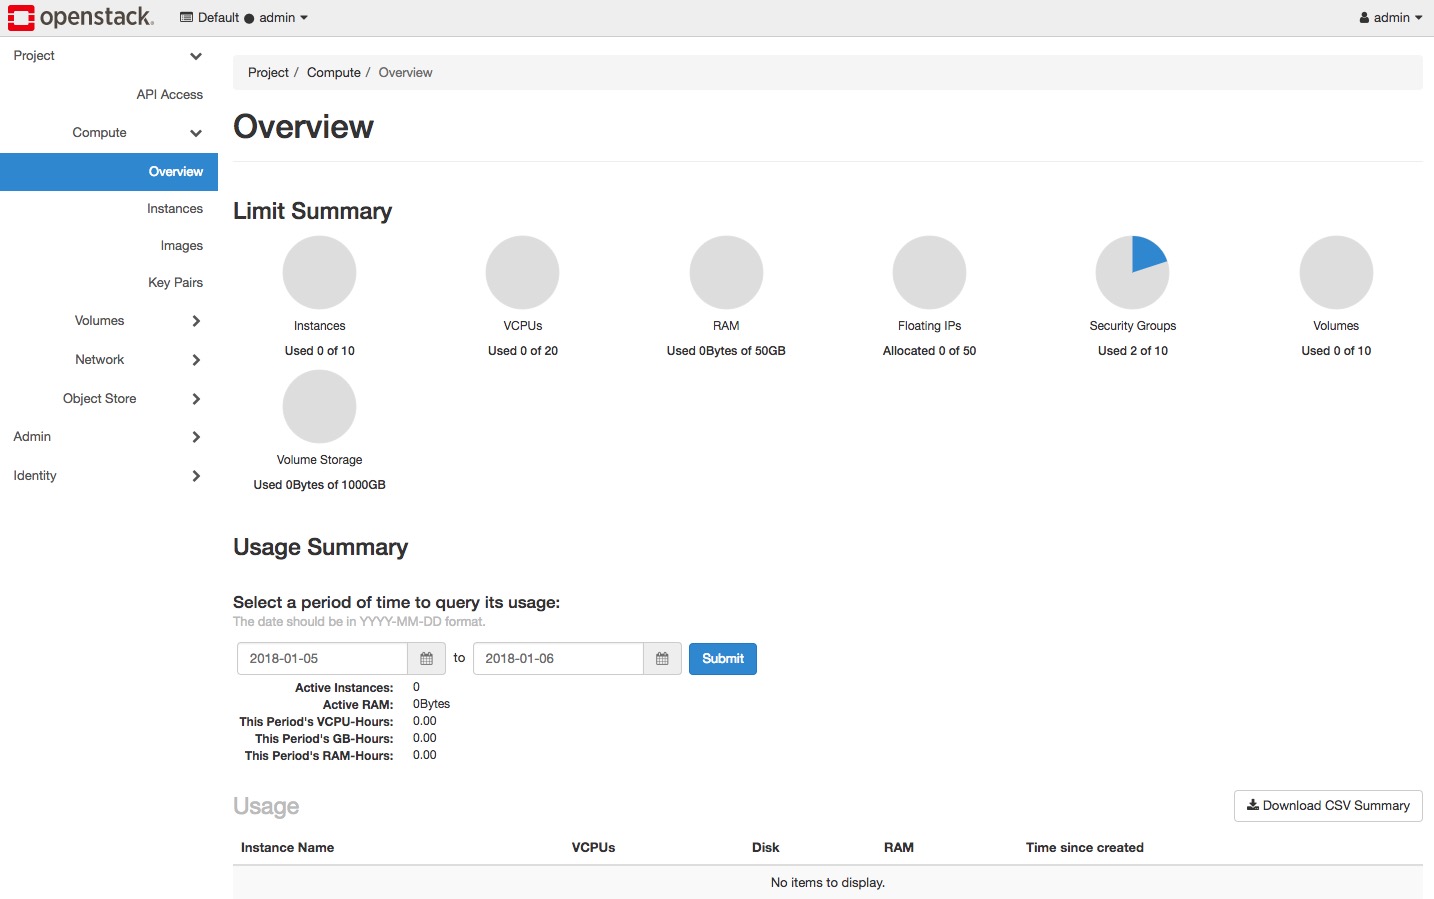
Figure: Project tab
From the Project tab, you can access the following categories:
API Access: View API endpoints.
Compute tab
Overview: View reports for the project.
Instances: View, launch, create a snapshot from, stop, pause, or reboot instances, or connect to them through VNC.
Images: View images and instance snapshots created by project users, plus any images that are publicly available. Create, edit, and delete images, and launch instances from images and snapshots.
Key Pairs: View, create, edit, import, and delete key pairs.
Volume tab
Volumes: View, create, edit, and delete volumes.
Backups: View, create, edit, and delete backups.
Snapshots: View, create, edit, and delete volume snapshots.
Consistency Groups: View, create, edit, and delete consistency groups.
Consistency Group Snapshots: View, create, edit, and delete consistency group snapshots.
Network tab
Network Topology: View the network topology.
Networks: Create and manage public and private networks.
Routers: Create and manage routers.
Security Groups: View, create, edit, and delete security groups and security group rules..
Floating IPs: Allocate an IP address to or release it from a project.
Object Store tab
Containers: Create and manage containers and objects.
OpenStack dashboard — Admin tab
Administrative users can use the Admin tab to view usage and to manage instances, volumes, flavors, images, networks, and so on.
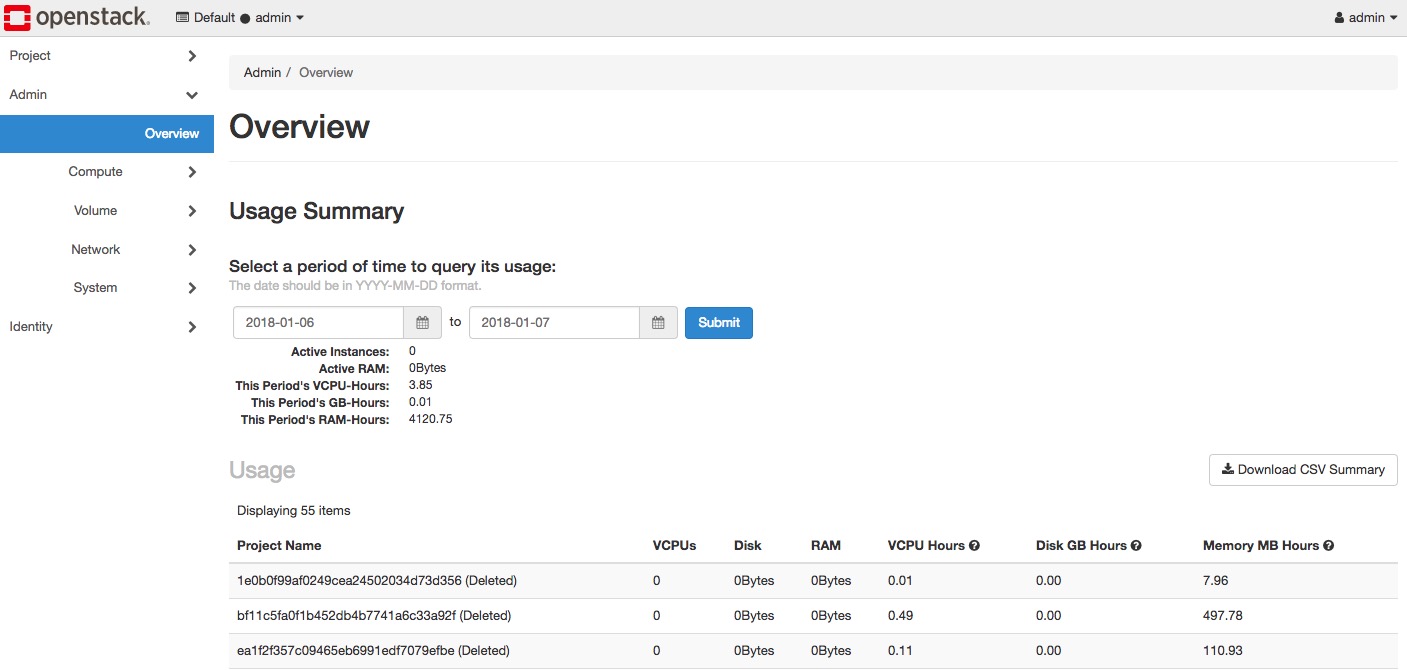
Figure: Admin tab
From the Admin tab, you can access the following category to complete these tasks:
Overview tab
Overview: View basic reports.
Compute tab
Hypervisors: View the hypervisor summary.
Host Aggregates: View, create, and edit host aggregates. View the list of availability zones.
Instances: View, pause, resume, suspend, migrate, soft or hard reboot, and delete running instances that belong to users of some, but not all, projects. Also, view the log for an instance or access an instance through VNC.
Flavors: View, create, edit, view extra specifications for, and delete flavors. A flavor is the size of an instance.
Images: View, create, edit properties for, and delete custom images.
Volume tab
Volumes: View, create, manage, and delete volumes.
Snapshots: View, manage, and delete volume snapshots.
Volume Types: View, create, manage, and delete volume types.
Network tab
Networks: View, create, edit properties for, and delete networks.
Routers: View, create, edit properties for, and delete routers.
Floating IPs: Allocate an IP address for a project or release it.
System tab
Defaults: View default quota values. Quotas are hard-coded in OpenStack Compute and define the maximum allowable size and number of resources.
Metadata Definitions: Import namespace and view the metadata information.
System Information: Use the following tabs to view the service information:
Services: View a list of the services.
Compute Services: View a list of all Compute services.
Block Storage Services: View a list of all Block Storage services.
Network Agents: View the network agents.
OpenStack dashboard — Identity tab
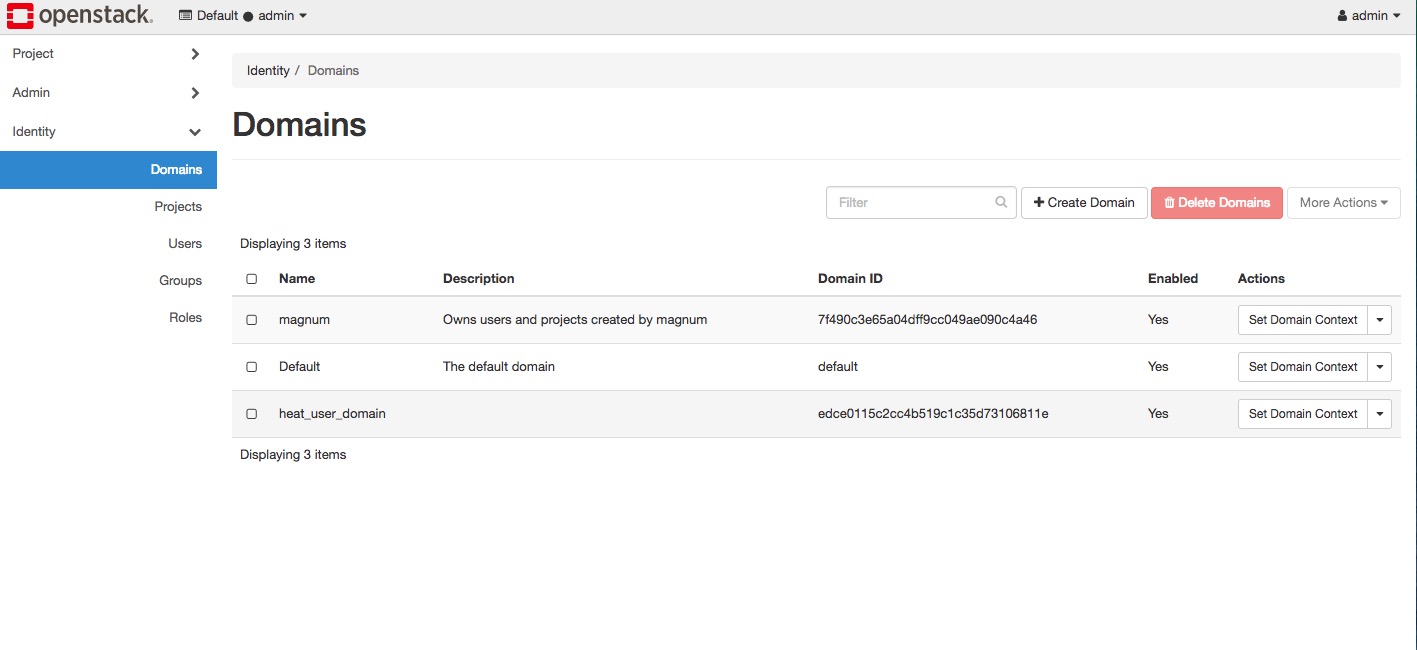
Figure:Identity tab
Projects: View, create, assign users to, remove users from, and delete projects.
Users: View, create, enable, disable, and delete users.
OpenStack dashboard — Settings tab
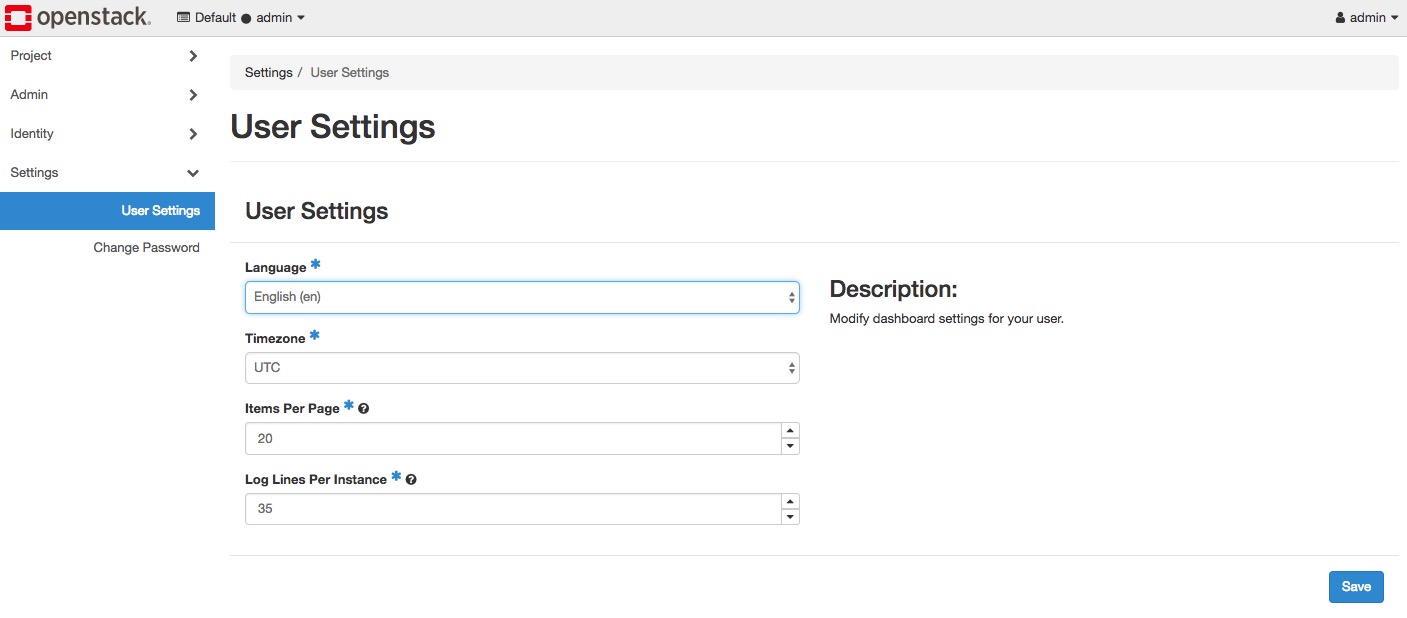
Figure:Settings tab
Click the Settings button from the user drop down menu at the top right of any page, you will see the Settings tab.
User Settings: View and manage dashboard settings.
Change Password: Change the password of the user.
