Debugging and Testing
To debug using a local engine and executor without dependencies such as
RabbitMQ, make sure your /etc/mistral/mistral.conf has the following
settings:
[DEFAULT]
rpc_backend = fake

[pecan]
auth_enable = False
and run the following command in pdb, PyDev or PyCharm:
mistral/cmd/launch.py --server all --config-file /etc/mistral/mistral.conf --use-debugger
Note
In PyCharm, you also need to enable the Gevent compatibility flag in Settings -> Build, Execution, Deployment -> Python Debugger -> Gevent compatible. Without this setting, PyCharm will not show variable values and become unstable during debugging.
Running unit tests in PyCharm
In order to be able to conveniently run unit tests, you need to:
Set unit tests as the default runner:
Settings -> Tools -> Python Integrated Tools -> Default test runner: Unittests
Enable test detection for all classes:
Run/Debug Configurations -> Defaults -> Python tests -> Unittests -> uncheck Inspect only subclasses of unittest.TestCase
Running examples
To run the examples find them in mistral-extra repository (https://github.com/openstack/mistral-extra) and follow the instructions on each example.
Automated Tests
On Mistral project we have two separate test suites:
Unit tests - executed by Jenkins CI job in OpenStack gerrit (python-style checks and execution of all unit tests)
Integration tests - executed by Devstack Gate job in OpenStack Gerrit (integration tests for Mistral after the OpenStack deployment with devstack)
Where we can find automated tests
mistral:
Unit tests can be found at https://github.com/openstack/mistral/tree/master/mistral/tests/unit
Integration tests can be found at https://github.com/openstack/mistral-tempest-plugin/tree/master/mistral_tempest_tests/tests
python-mistralclient:
Unit tests can be found at https://github.com/openstack/python-mistralclient/tree/master/mistralclient/tests/unit
Integration tests can be found at https://github.com/openstack/python-mistralclient/tree/master/mistralclient/tests/functional
How to execute tests manually
Almost all existing automated tests can be executed manually on the developer’s desktop (except those which check OpenStack actions). To do this, you should clone “mistral” repository (or “python-mistralclient”) and run the corresponding commands.
Cloning a repository:
$ git clone https://git.opendev.org/openstack/mistral.git
$ cd mistral
Unit tests
To run all unit tests:
$ tox
To run unit tests against a specific python version:
$ tox -e py3
To run tests from a specific test class (using a specific python version):
tox -e py3 -- 'DataFlowEngineTest'
Integration tests
There are several suites of integration tests the mentioned repositories:
mistral-tempest-plugin:
mistral_tempest_tests/tests/api/v2/test_workflows.py - contains the tests checking Mistral API v2 related to workflows
mistral_tempest_tests/tests/api/v2/test_actions.py - contains the tests checking Mistral API v2 related to actions
and so on
python-mistralclient:
mistralclient/tests/functional/cli/v2/ - contains test suites which check interaction with Mistral using CLI
To run integration tests:
$ pip install git+http://git.opendev.org/openstack/tempest.git
$ pip install git+http://git.opendev.org/openstack/mistral-tempest-plugin.git
$ tempest run -- mistral_tempest_plugin.mistral_tempest_tests.api.v2
Mistral-Dashboard debug instructions
Pycharm
Debugging OpenStack Mistral-Dashboard is the same as debugging OpenStack Horizon.
The following instructions should get you sorted to debug both on the same run.
Set PyCharm debug settings:
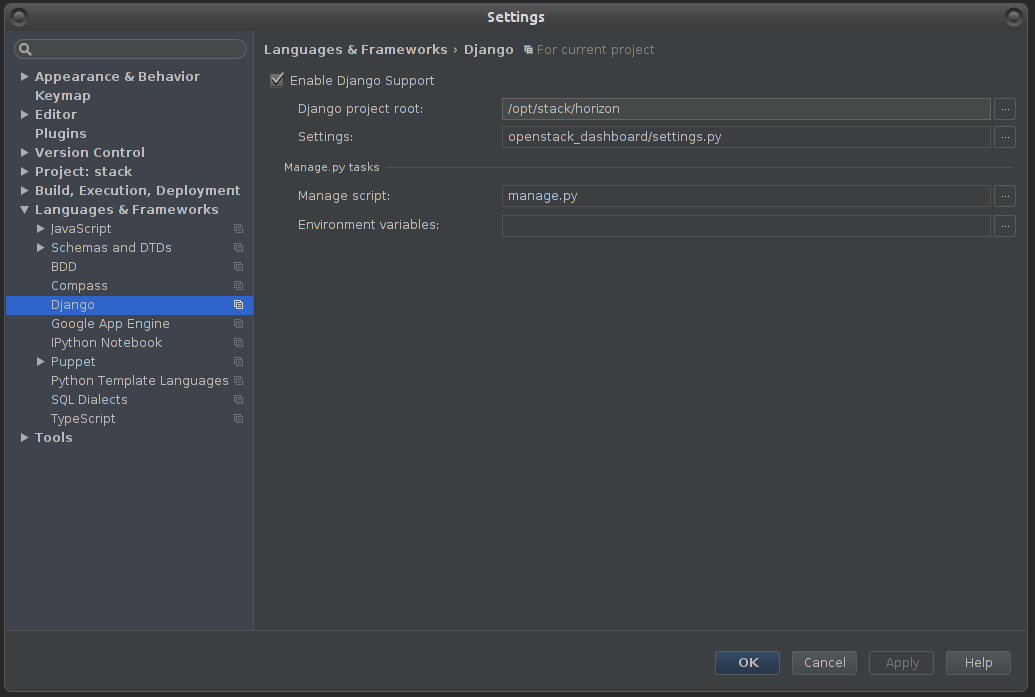
1. Under File > Settings > Languages and Framework > Django - Enter the following:
Check “Enable Django Support”
Django project root: your file system path to Horizon project root
Settings: openstack_dashboard/settings.py (under your Horizon folder)
Manage script: manage.py (also in your horizon folder)
Click OK
Enter debug configurations menu, using the tiny arrow pointing down, left to the “play” icon, or under the run menu
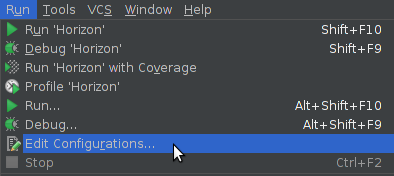
In the new window, click the green plus icon and then select “Django server” to create a new Django Server configuration.
In the new window appeared:
Name that configuration Horizon
Enter some port so it won’t run on the default (for example - port: 4000)
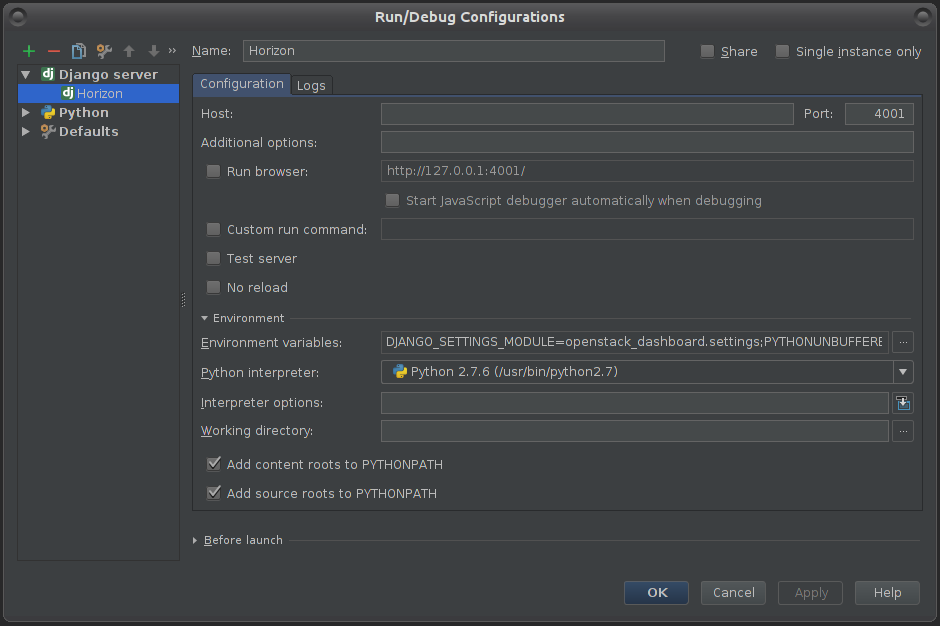
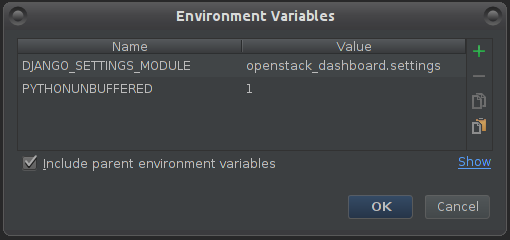
Click on Environment variables button, then in the new window:
Make sure you have PYTHONUNBUFFERED set as 1
Create a new pair - DJANGO_SETTINGS_MODULE : openstack_dashboard.settings
When finished click OK.
You should now be able to debug and run the project using PyCharm. PyCharm will listen to any changes you make and restart the Horizon server automatically.
Note: When executing the project via PyCharm Run / Debug, you could get an error page after trying to login: “Page not found (404)”. To resolve that - remove the port from the browser URL bar, then login. You should be able to login without it. After a successful login bring the port back - it will continue your session.
Further notes
If you need help with PyCharm and general debugging, please refer to: JetBrains PyCharm developer guide
If you would like to manually restart the apache server, open a terminal and run:
$ sudo systemctl restart apache2
(if not under Ubuntu, replace “sudo” with an identical command)
