[ English | русский | Indonesia ]
Building a Windows Server Image for OpenStack
This guide describes, end to end, how to build a reusable Windows Server image for an OpenStack cloud. The general approach is as follows:
Upload the official Windows installation media and the VirtIO driver ISO to the Image service (Glance).
Boot a temporary instance from a blank volume, attaching both ISOs as virtual CD-ROM devices.
Install Windows Server, the VirtIO paravirtualized drivers, the QEMU guest agent, the balloon (dynamic memory) service, and Cloudbase-Init.
Generalize the installation with Sysprep and shut the instance down.
Detach the resulting volume and upload it to the Image service as a new, reusable Glance image.
Once published, this image can be used as the image source for any future instance, and Cloudbase-Init will take care of per-instance customization (administrator password, hostname, and network configuration) on first boot.
Prasyarat
A Linux client machine (Debian, Ubuntu, RHEL, CentOS or AlmaLinux) — or Windows Subsystem for Linux (WSL), see this example guide used only to run the
openstackcommand-line client; it does not need to be powerful, only network-reachable to the OpenStack API endpoints.Permission to manage security groups and floating IPs in the target project.
A local machine with an RDP client to connect to the instance once it is reachable over the network.
Obtaining OpenStack Credentials
Before the openstack command-line client can be used, it needs credentials for the target project. The Horizon dashboard can generate these automatically.
Log in to Horizon, open the account menu in the top-right corner (or navigate to Project -> API Access in some Horizon themes), and download either the OpenStack RC File or the OpenStack clouds.yaml File. Either one is sufficient; this guide uses the RC file.
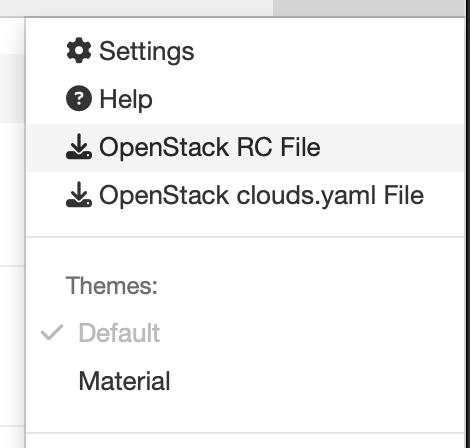
Downloading the project credentials from the Horizon dashboard.
Copy the downloaded file to the Linux client and source it. You will be prompted for the account password if it was not embedded in the file:
# Example content of the downloaded RC file (values are placeholders)
#!/usr/bin/env bash
export OS_AUTH_URL="https://<keystone-endpoint>:5000/v3"
export OS_PROJECT_ID="<project_id>"
export OS_PROJECT_NAME="<project_name>"
export OS_USER_DOMAIN_NAME="Default"
export OS_PROJECT_DOMAIN_ID="default"
export OS_USERNAME="<username>"
export OS_REGION_NAME="<region_name>"
export OS_INTERFACE=public
export OS_IDENTITY_API_VERSION=3
echo "Please enter your OpenStack Password for project $OS_PROJECT_NAME as user $OS_USERNAME: "
read -sr OS_PASSWORD_INPUT
export OS_PASSWORD=$OS_PASSWORD_INPUT
source admin-openrc.sh
Installing the OpenStack Client
Install python-openstackclient on the Linux client used to run the
openstack commands in this guide. The package is available from most
distributions' repositories, or from PyPI with pip. Installing into a
Python virtual environment is recommended, so that the client and its
dependencies stay isolated from any system-managed Python packages:
python3 -m venv ~/openstack-venv
source ~/openstack-venv/bin/activate
pip install python-openstackclient
Verify that the client can authenticate against the cloud:
openstack image list
Preparing the Installation Media
Two ISO images are required to build the instance:
The official Windows Server installation media. This guide uses Windows Server 2025, available from the Microsoft Evaluation Center.
The VirtIO driver ISO, which provides paravirtualized disk, network, and memory-balloon drivers for KVM/QEMU-based hypervisors. This guide uses version 0.1.302.
Download both ISO files to the Linux client before continuing.
Uploading the Images to the Image Service
With both ISOs on the client, upload them to Glance as private images so they can be attached to the build instance as virtual CD-ROM devices.
Upload the Windows installer ISO:
openstack image create \
  --disk-format iso \
  --container-format bare \
  --file <your_windows_installer.iso> \
  --private \
  "Win 2025 Installer"
Upload the VirtIO driver ISO:
openstack image create \
  --disk-format iso \
  --container-format bare \
  --file virtio-win.iso \
  --private \
  "virtio-win"
Record the resulting image IDs (openstack image list will show them);
they are needed in the next step.
Booting the Installation Instance
Boot a temporary instance from a blank volume, with the Windows installer
and the VirtIO driver ISO attached as CD-ROM devices. The blank volume
becomes the future system disk and uses the VirtIO SCSI/block bus
(disk_bus=virtio) so that it will require the VirtIO storage driver
during setup; the ISOs are attached on the IDE bus, which Windows Setup
can read natively without any extra drivers.
openstack server create \
  --flavor <your_flavor_id> \
  --block-device source_type=blank,destination_type=volume,volume_size=50,disk_bus=virtio,boot_index=1 \
  --block-device source_type=image,uuid=<windows_installer_image_id>,destination_type=volume,volume_size=10,disk_bus=ide,device_type=cdrom,boot_index=0 \
  --block-device source_type=image,uuid=<virtio_win_image_id>,destination_type=volume,volume_size=2,disk_bus=ide,device_type=cdrom,boot_index=2 \
  --network <your_network_id> \
  Win-Install
Because boot_index=0 is assigned to the Windows installer ISO, the
instance boots directly into Windows Setup. Wait for the instance to
reach the ACTIVE state, then open its console from Horizon
(Compute -> Instances -> Win-Install -> Console).
Installing Windows Server
The console should show the first screen of Windows Setup.
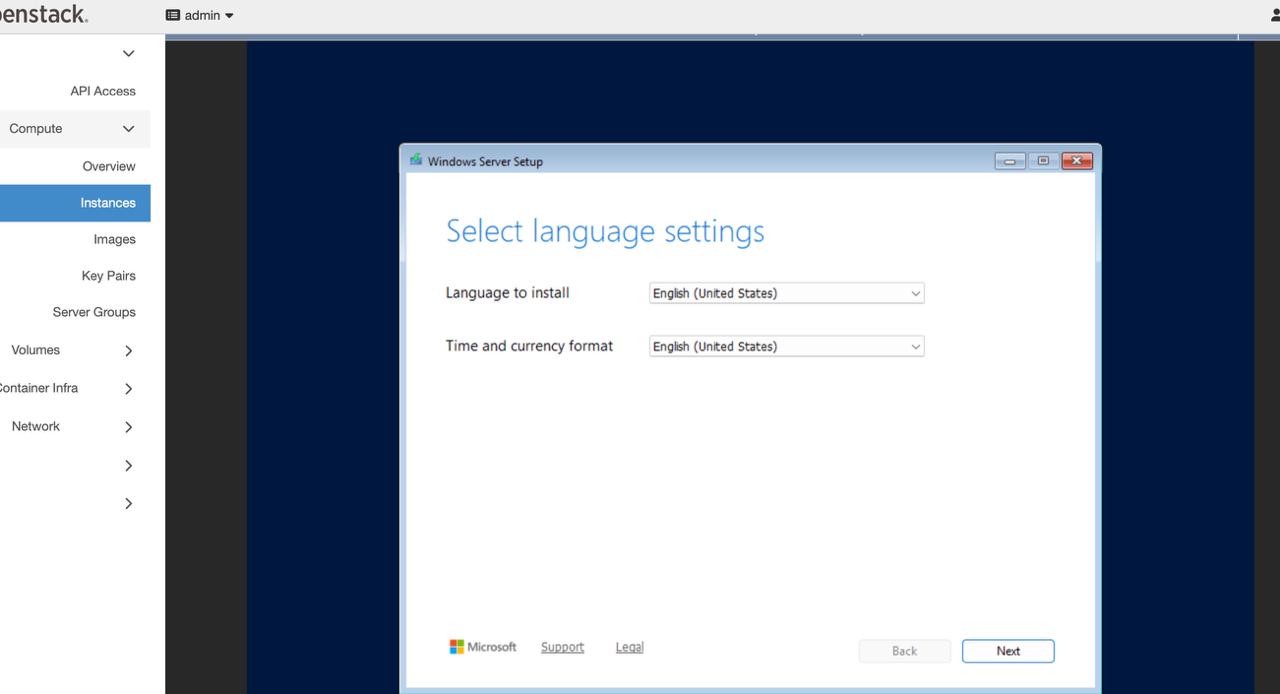
The initial Windows Setup screen, reached automatically because the
installer ISO was assigned boot_index=0.
Proceed through the wizard: accept the default language and keyboard settings, click Install now, select the desired Windows Server edition, and accept the license terms. When Setup reaches the disk selection screen, the list will be empty, because the system volume was attached over the VirtIO bus and Windows does not ship a driver for it by default.
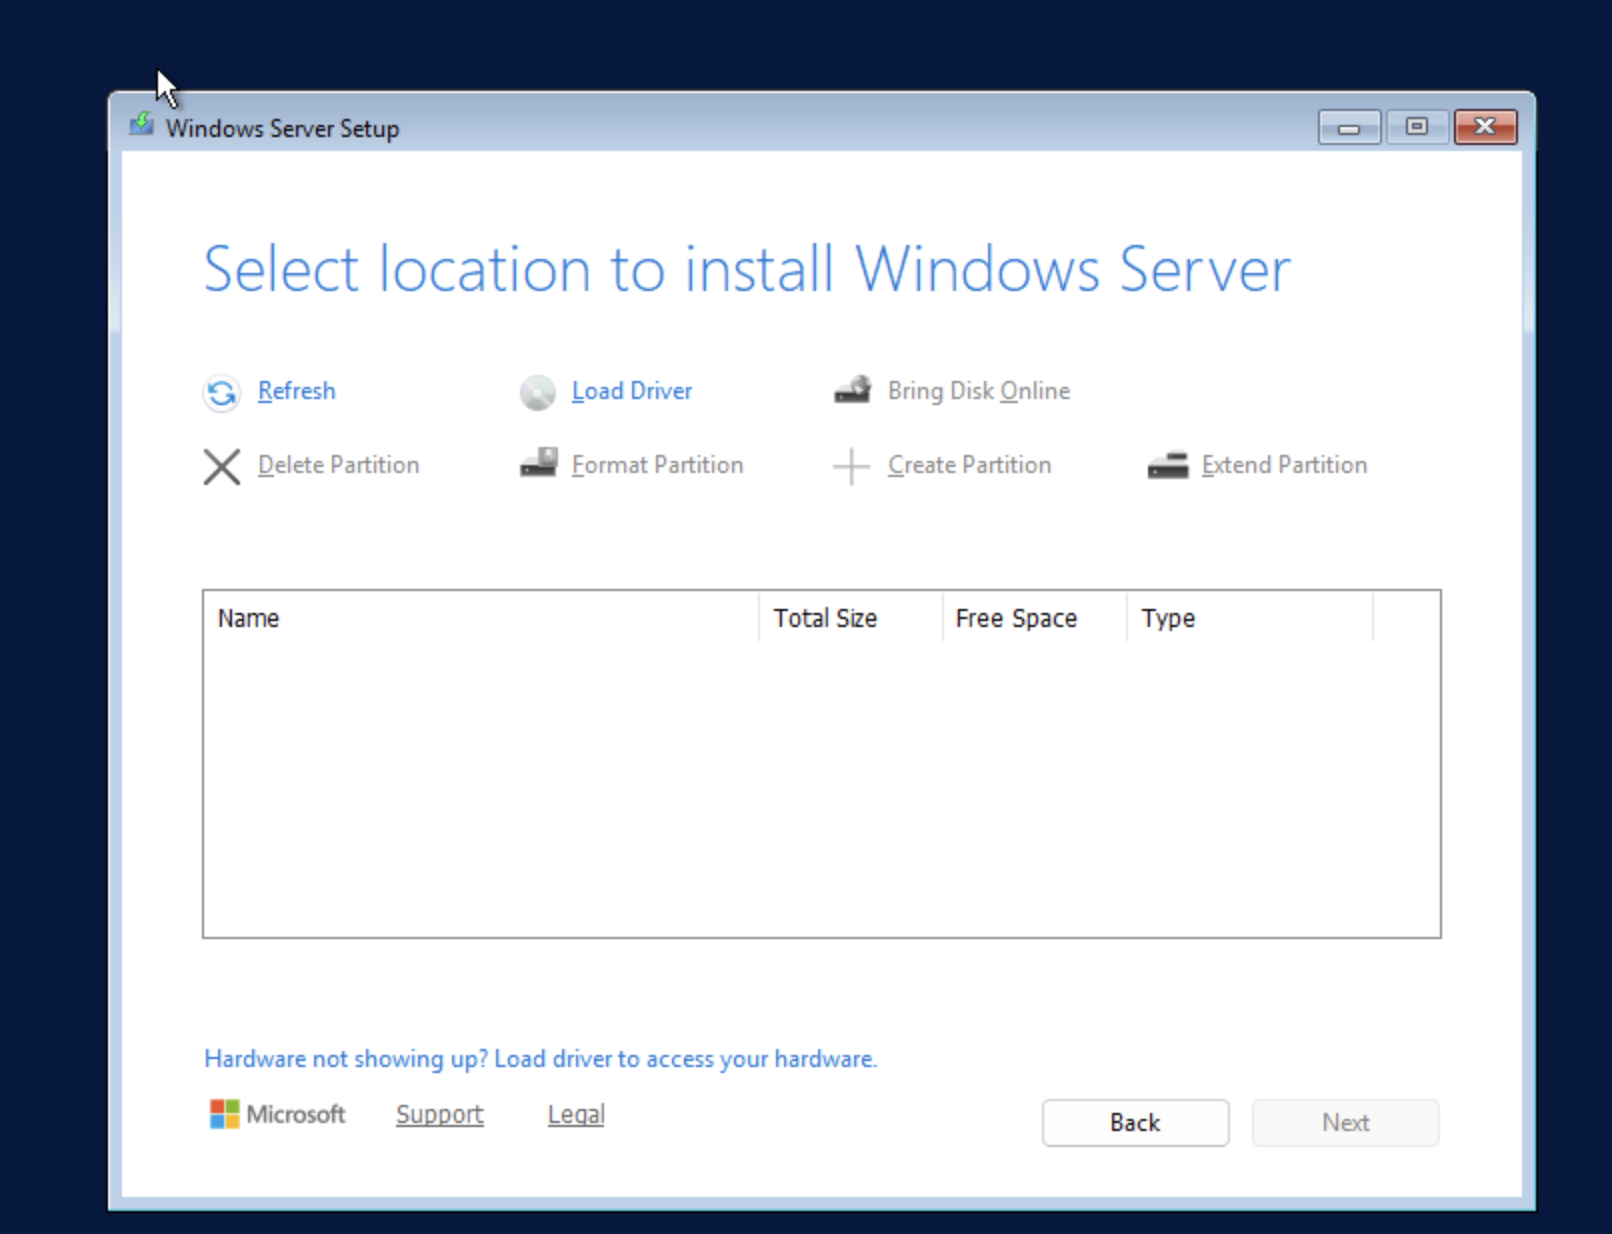
No disks are visible yet: the VirtIO block driver has not been loaded.
Click Load driver, then Browse, and navigate on the VirtIO driver
CD-ROM (typically drive E:) to the viostor directory that matches
the target Windows version and architecture, for example
E:\viostor\2k25\amd64.
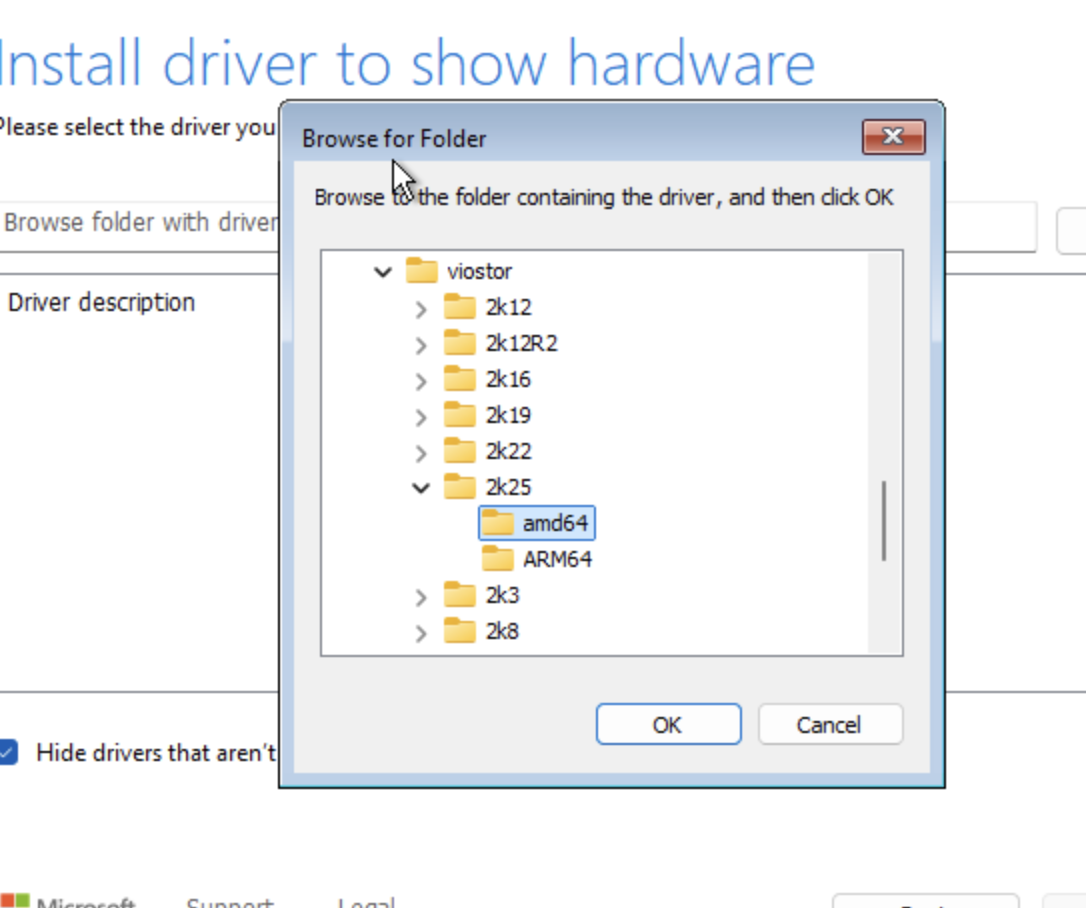
Locating the viostor (VirtIO SCSI/block) driver on the VirtIO ISO.
Confirm the folder, select the listed VirtIO SCSI controller driver, and click Next to install it. The blank system volume then becomes visible as unallocated space.
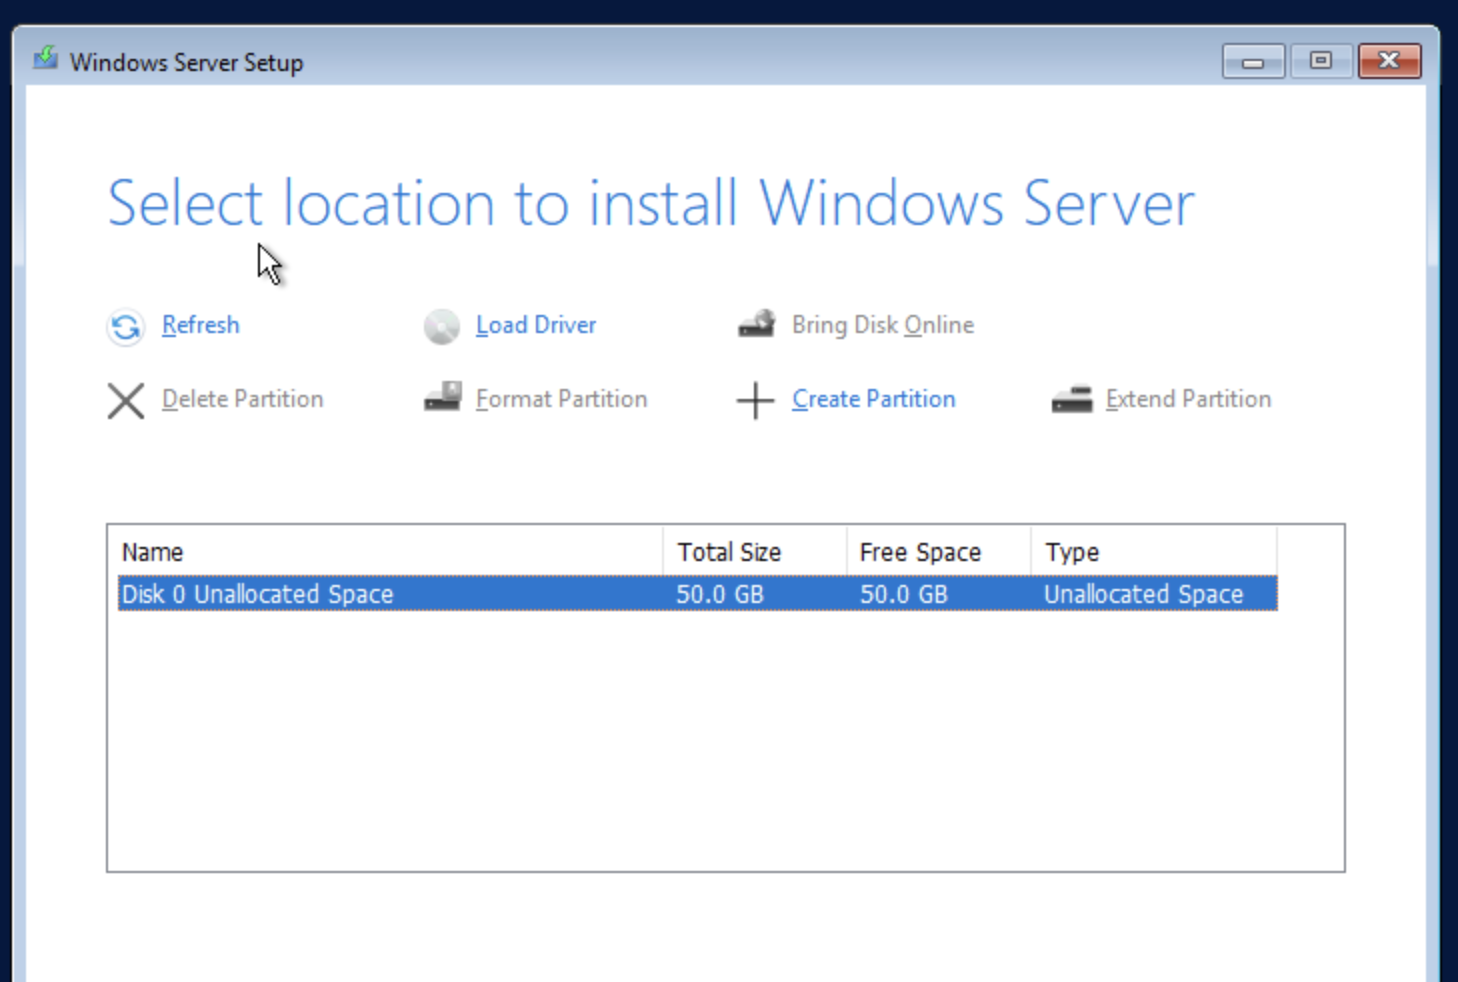
The 50 GB system volume is now visible after the VirtIO driver has been loaded.
Select the disk, create a partition (or accept Setup's default layout),
and click Next to begin installation. Windows Setup copies files and
reboots the instance several times as part of the installation process;
this can take several minutes. When installation finishes, set the new
password for the local Administrator account and complete the first
sign-in.
Catatan
Only the storage driver is required at this stage. The remaining VirtIO drivers (network, balloon, serial, and so on) are installed after the first successful logon, in the next section.
Installing the VirtIO Drivers
After signing in, open an Windows Command Prompt and install the
remaining VirtIO drivers from the driver ISO using pnputil. Adjust
the version subdirectory (2k25 in the examples below) to match the
Windows Server version being installed.
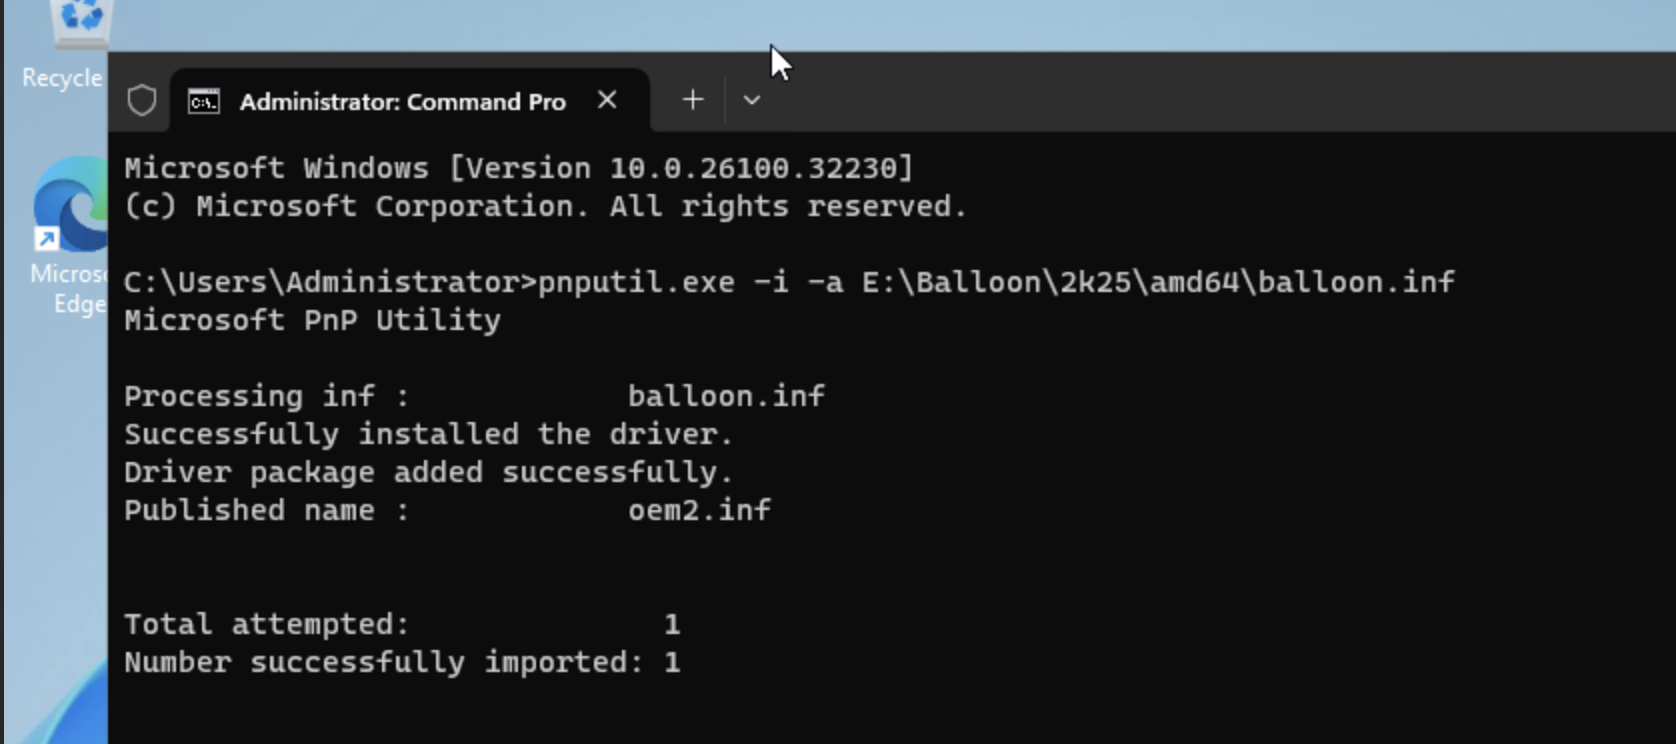
Installing a VirtIO driver package with pnputil -i -a.
pnputil -i -a E:\Balloon\2k25\amd64\balloon.inf
pnputil -i -a E:\NetKVM\2k25\amd64\netkvm.inf
pnputil -i -a E:\pvpanic\2k25\amd64\pvpanic.inf
pnputil -i -a E:\qemupciserial\2k25\amd64\qemupciserial.inf
pnputil -i -a E:\vioinput\2k25\amd64\vioinput.inf
pnputil -i -a E:\viorng\2k25\amd64\viorng.inf
pnputil -i -a E:\vioscsi\2k25\amd64\vioscsi.inf
pnputil -i -a E:\vioserial\2k25\amd64\vioserial.inf
Each invocation should report Successfully installed the driver and
Driver package added successfully.
Installing the QEMU Guest Agent
The VirtIO ISO also ships an MSI installer for the QEMU guest agent, which allows the hypervisor to query guest status and issue commands such as filesystem freeze/thaw for consistent snapshots. Run it from the same elevated Command Prompt:
E:\guest-agent\qemu-ga-x86_64.msi
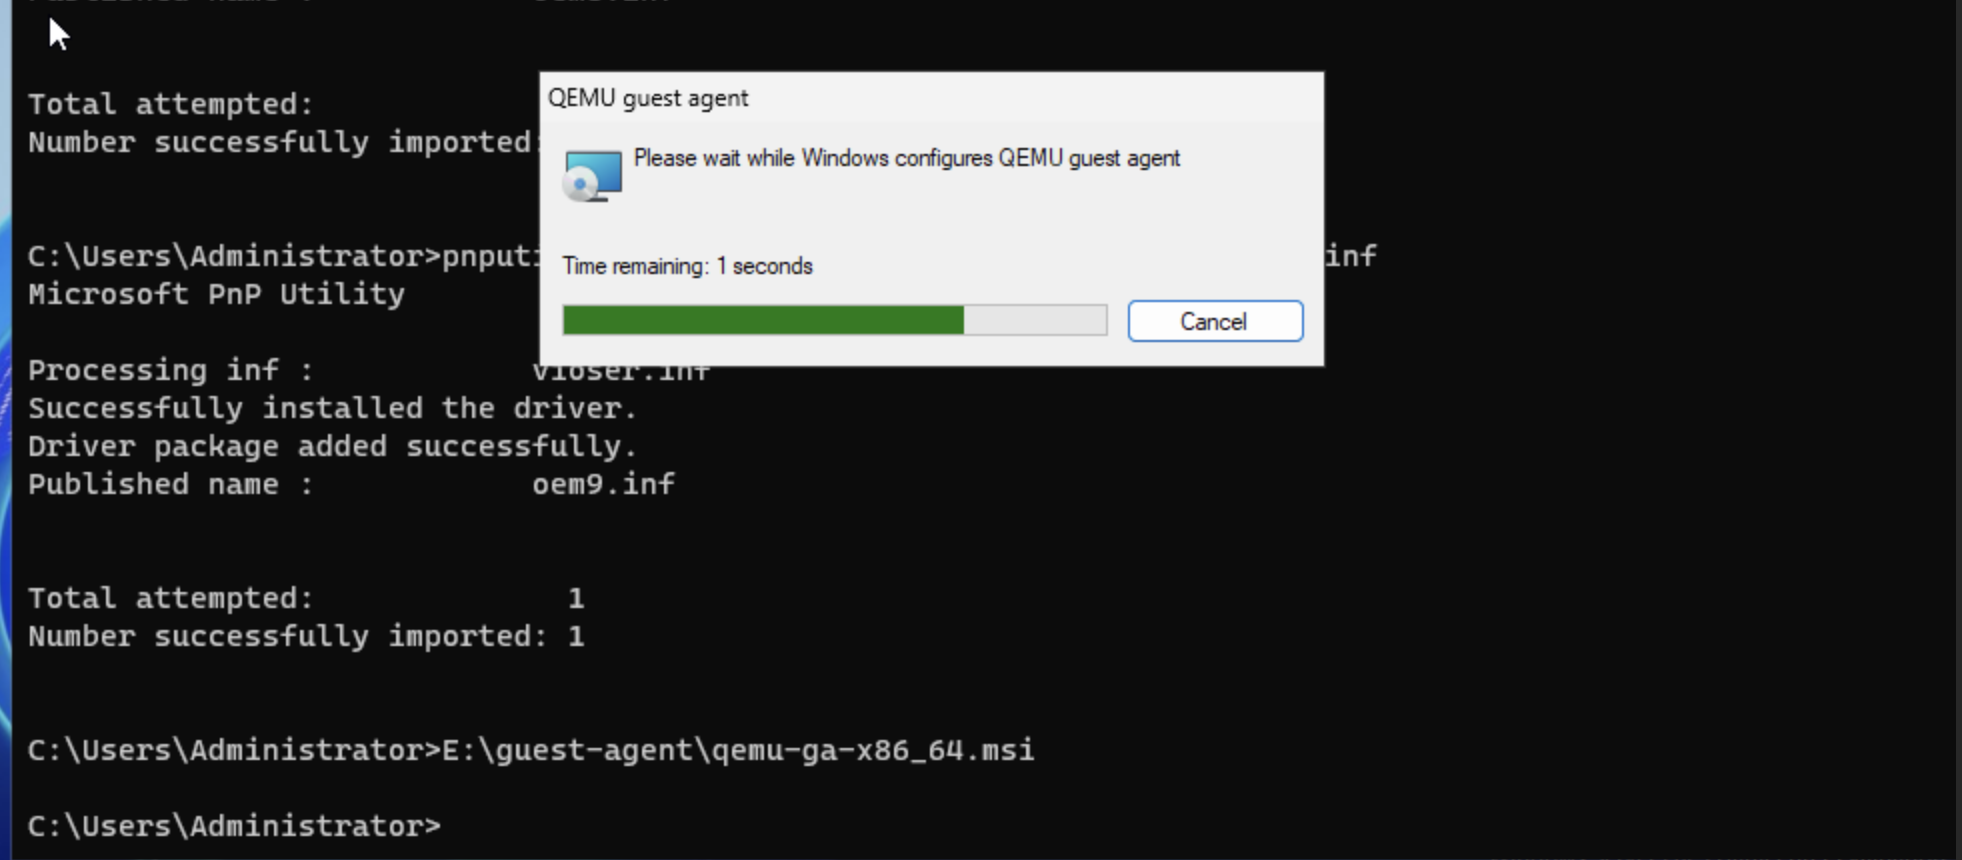
The QEMU guest agent installing silently after the VirtIO serial driver has been loaded.
The installer runs with no further prompts and returns to the command line once complete.
Installing the Balloon (Dynamic Memory) Service
The balloon driver installed earlier exposes a virtual device, but the
companion balloon service (blnsvr) must also be installed so that
the guest can respond to memory ballooning requests from the hypervisor.
Copy the Balloon directory from the VirtIO ISO to a local path, for
example C:\Balloon, and run the service installer from there.
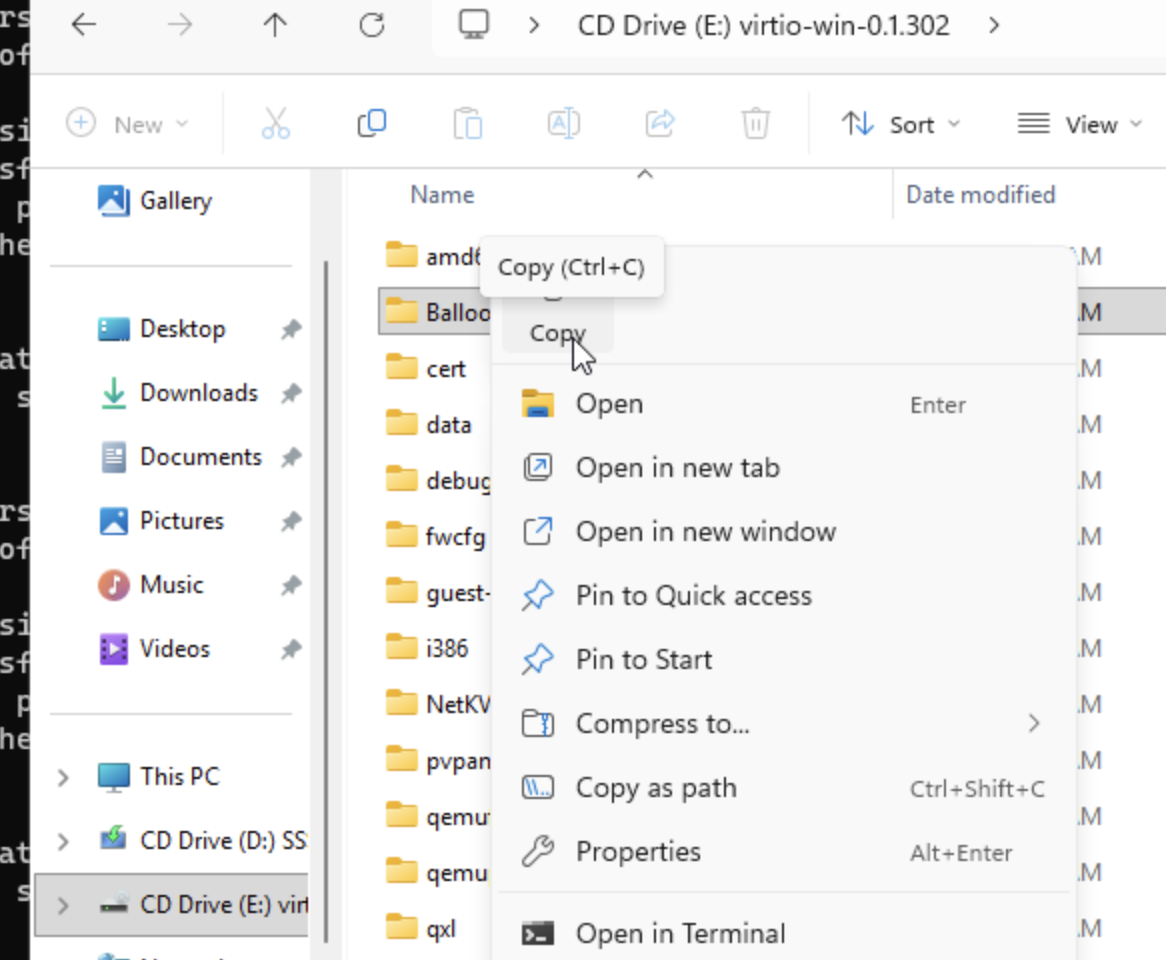
Copying the Balloon directory from the mounted VirtIO ISO to local
storage.
C:\Balloon\2k25\amd64\blnsvr.exe -i
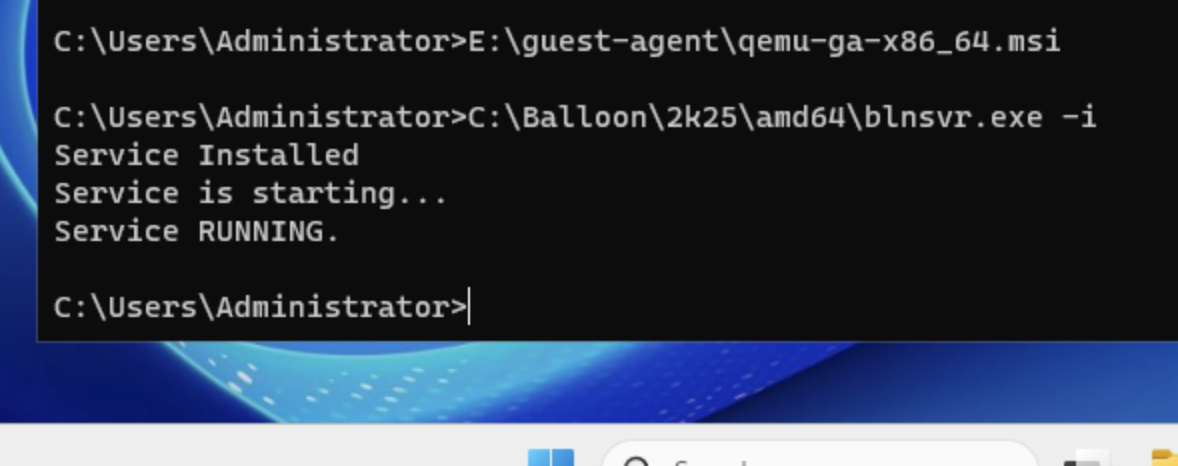
The balloon service reports Service Installed and
Service RUNNING.
The service can be confirmed in Task Manager, listed as blnsvr with a
child process named Balloon Service.
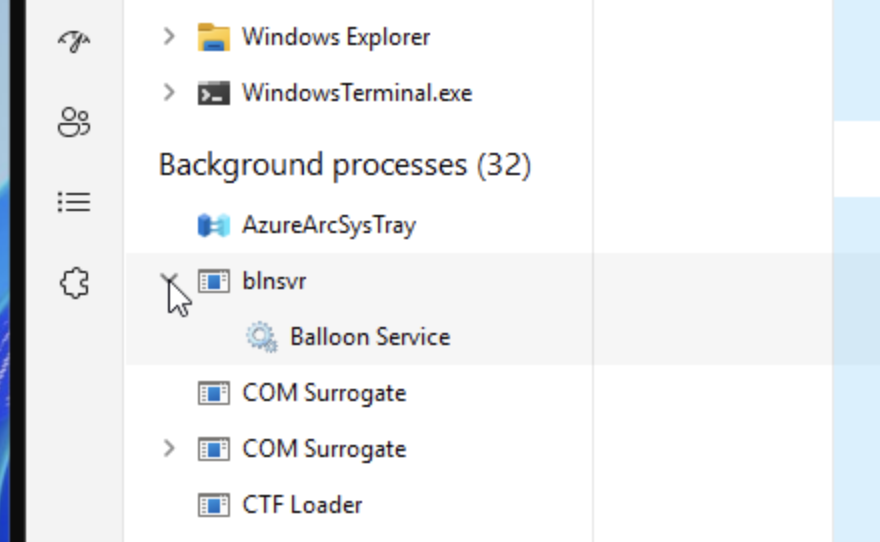
The balloon service visible under Background processes in Task Manager.
Configuring Network Access
Reboot the instance so that all newly installed drivers, particularly
netkvm, are fully applied. After the reboot, the network adapter
should be recognized and, depending on the DHCP configuration of the
subnet, an IP address should be assigned automatically.
To reach the instance remotely, enable Remote Desktop from Settings -> System -> Remote Desktop, toggle it on, and confirm the prompt.
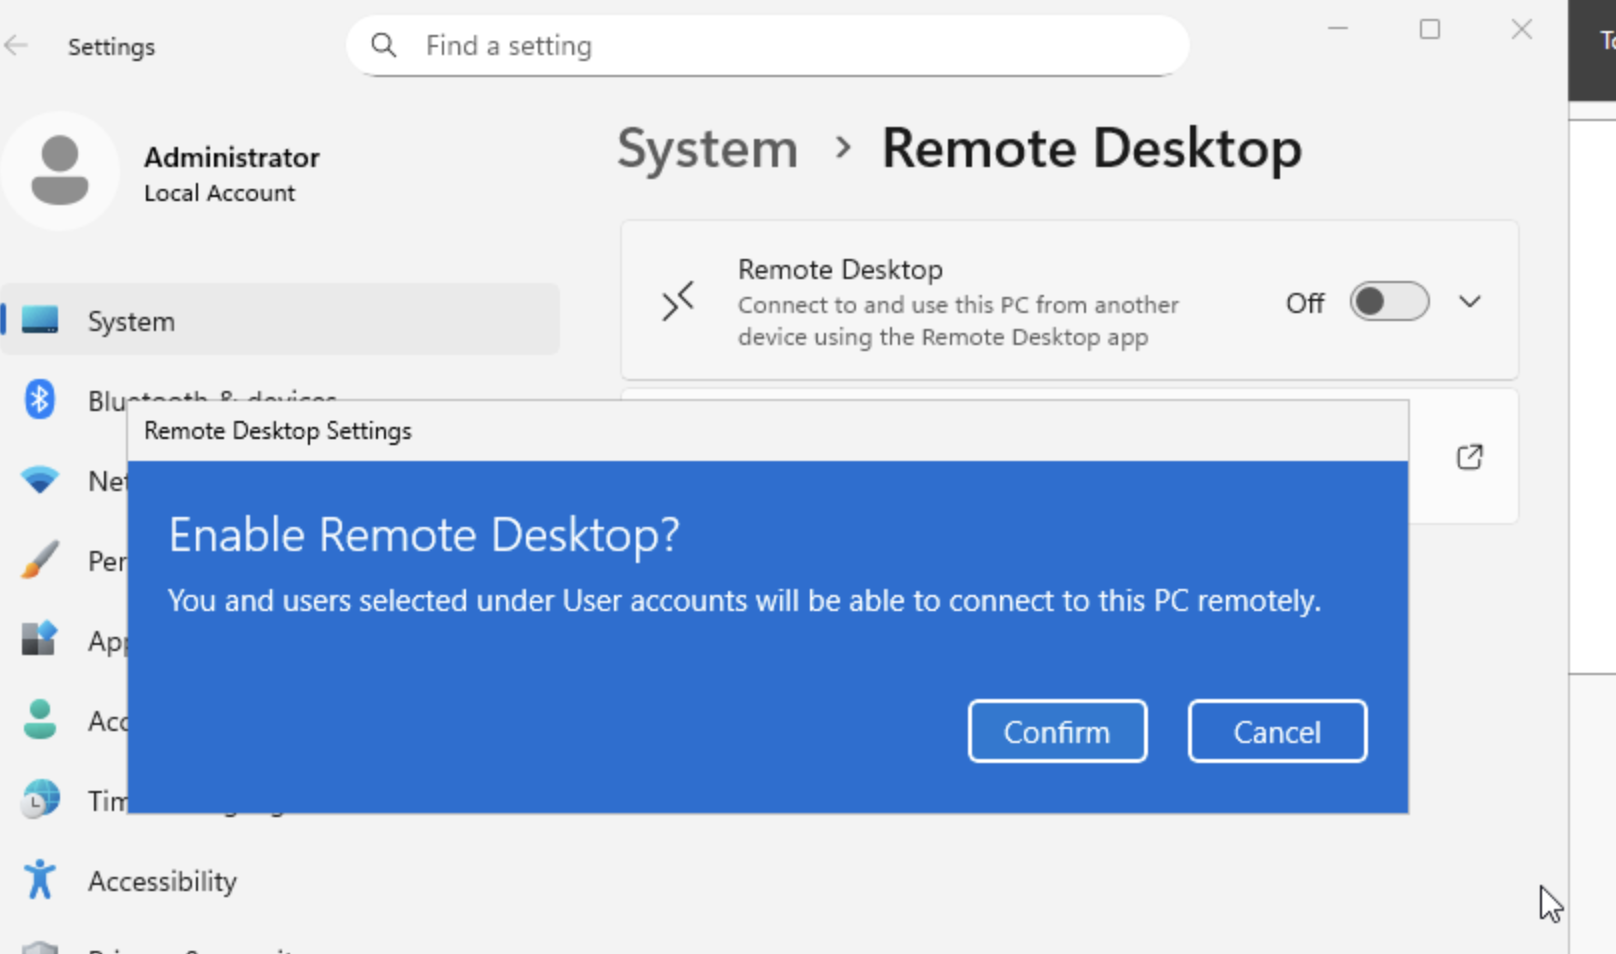
Enabling Remote Desktop from Windows Settings.
Next, permit RDP traffic at the OpenStack network layer. In Horizon,
open the relevant security group and add a rule using the predefined
RDP template, restricting the CIDR field to the smallest range
that meets your access requirements rather than leaving it fully open.
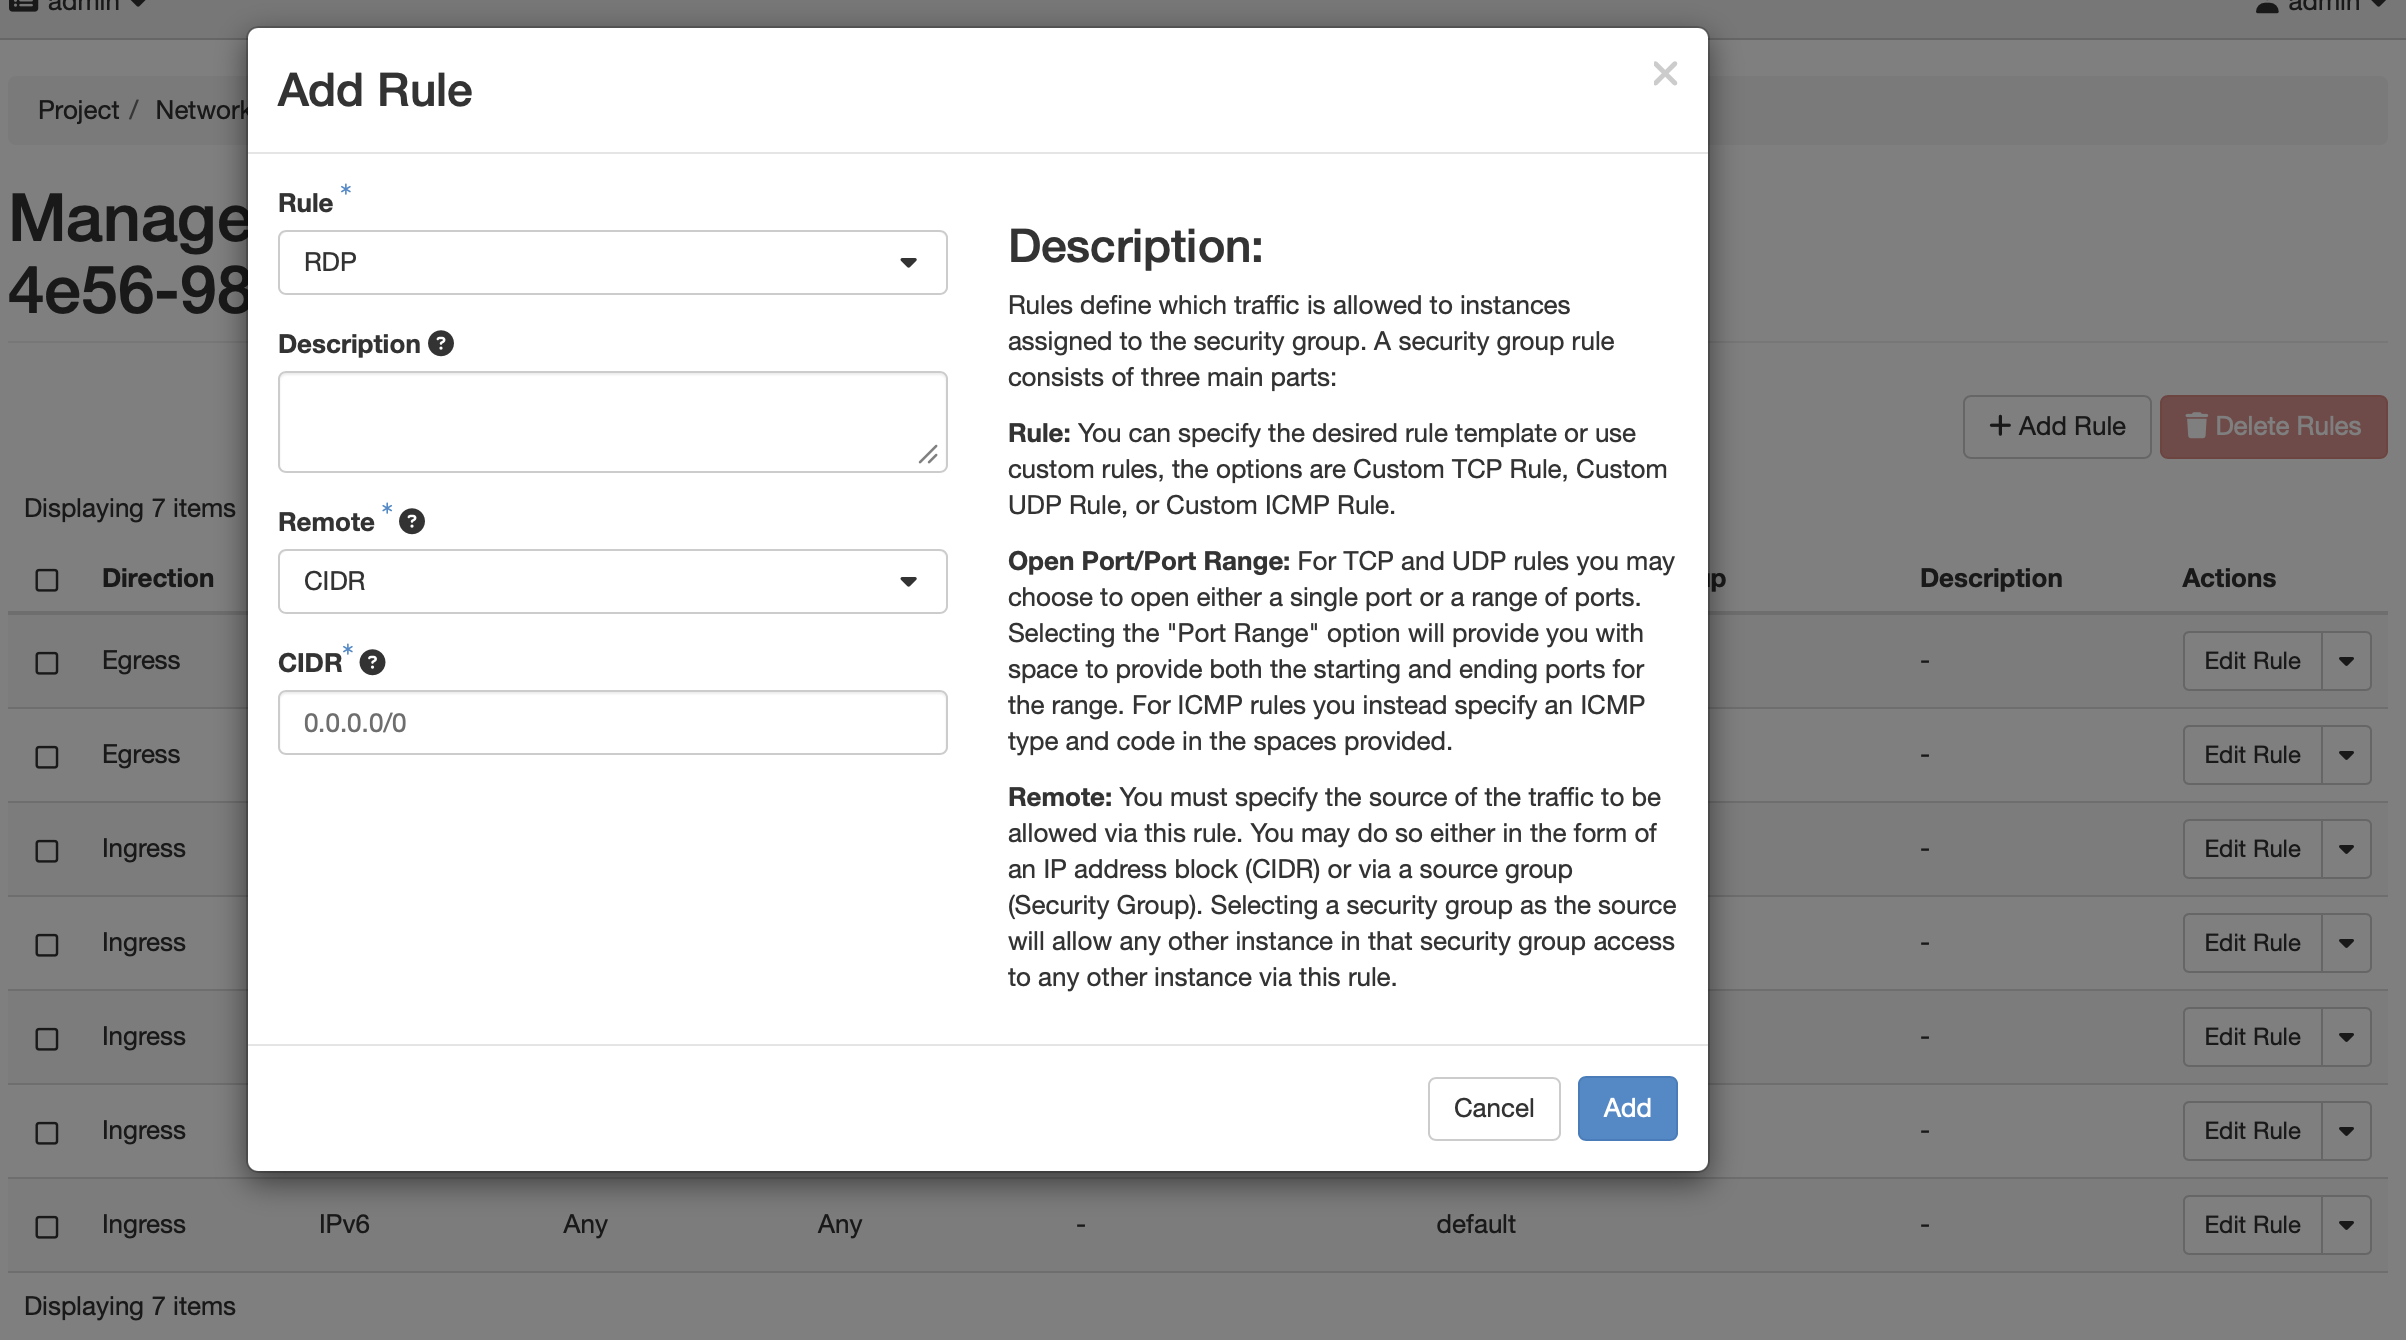
Adding an RDP rule to the instance's security group.
Finally, associate a floating IP with the instance so that it is reachable from outside the OpenStack project network, via Compute -> Instances -> Associate Floating IP.
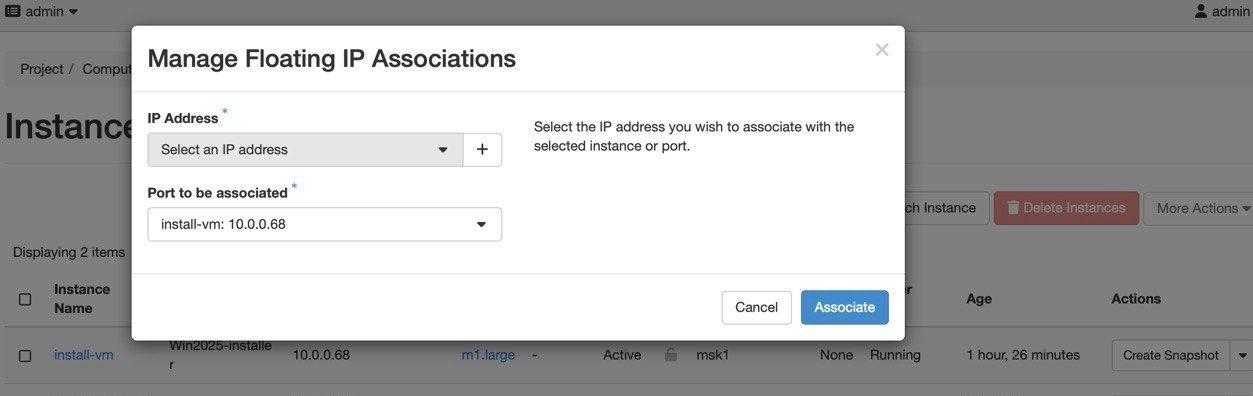
Associating a floating IP address with the installation instance.
Peringatan
Restrict the RDP security group rule to trusted source addresses.
Exposing RDP to 0.0.0.0/0 is a common attack vector and should be
avoided outside of build instances.
With the security group rule and floating IP in place, connect to the
instance using any RDP client and the Administrator credentials set
earlier.
Installing Cloudbase-Init
Cloudbase-Init is the Windows equivalent of cloud-init: it reads instance metadata from the OpenStack metadata service on first boot and applies settings such as the administrator password, hostname, etc. Installing it is what makes the resulting image reusable for many future instances, rather than a one-off Windows installation.
From within the RDP session, download the installer.
Run the installer. On the configuration screen, set the username to
Administrator, enable Use metadata password so that the password
supplied by OpenStack at instance creation is applied on first boot, and
confirm that the user is a member of the Administrators local group.
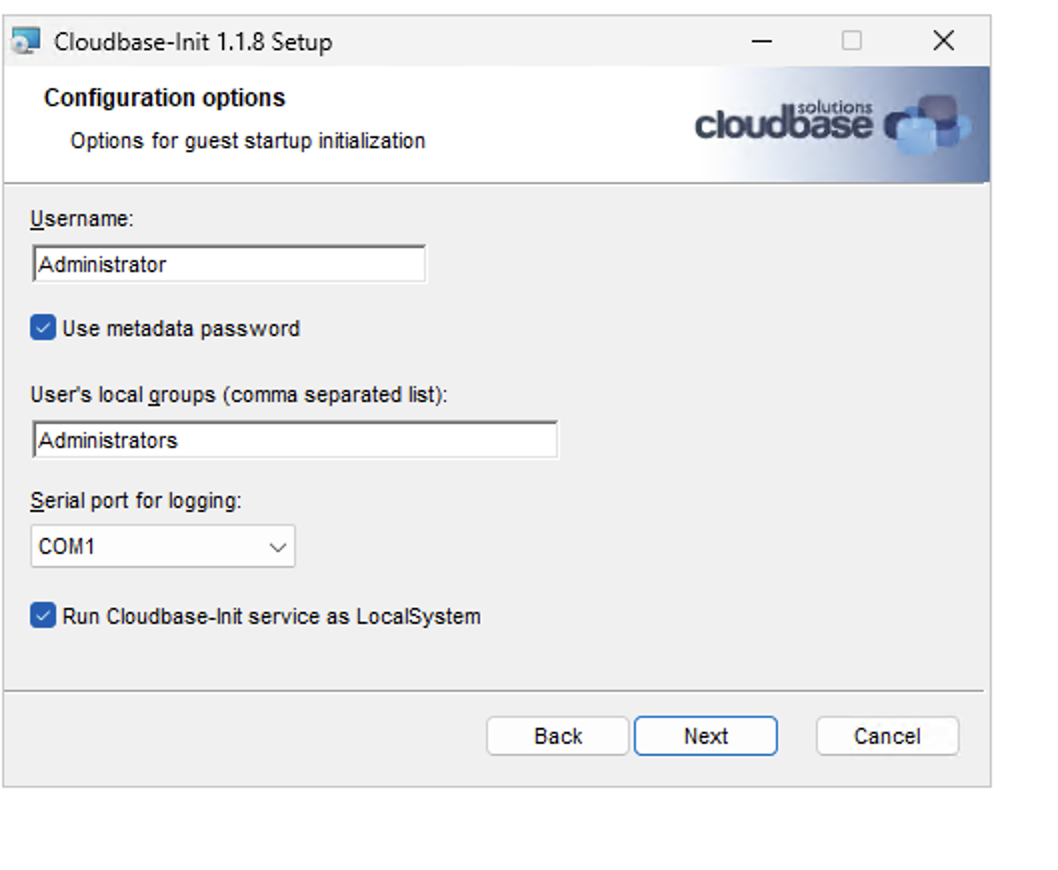
Cloudbase-Init configuration: username, metadata password, and local group membership.
Complete the remaining installer screens with their default values.
Generalizing the Image with Sysprep
On the final screen of the Cloudbase-Init installer, select Run Sysprep to create a generalized image and Shutdown when Sysprep terminates, then click Finish.
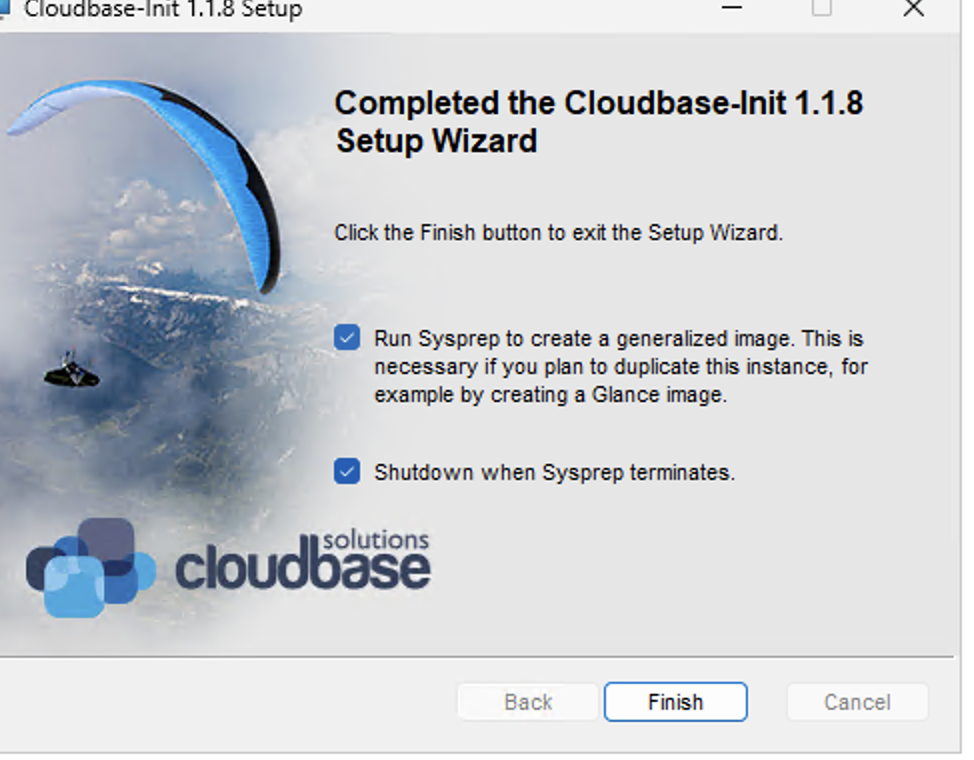
Running Sysprep and shutting the instance down on completion, as the final step of the Cloudbase-Init installer.
Sysprep removes machine-specific state (security identifiers, computer
name, installed-driver associations, and so on) so that the image can be
safely duplicated into many independent instances. Once Sysprep
completes, the instance powers itself off; wait for Horizon to report
the instance as SHUTOFF before continuing.
Catatan
Do not start the instance again after Sysprep has run and it has shut down. Booting a generalized instance would trigger a new, instance-specific specialization pass and effectively rebind the image to that one instance, defeating the purpose of the capture.
Publishing the Final Image
With the instance powered off, detach the system volume and capture it as a new Glance image so it can be reused as a boot source.
In Horizon, go to Project -> Volumes, locate the volume attached to the build instance, and choose Manage Attachments from the volume's action menu.
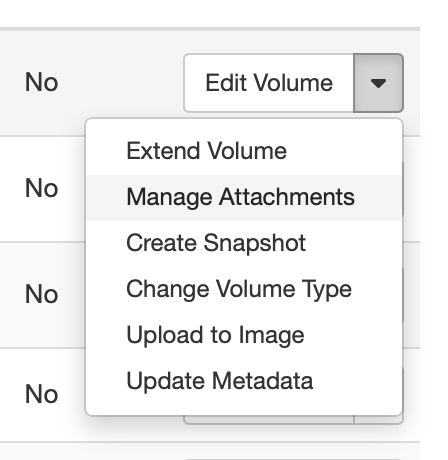
The per-volume action menu in the Volumes list.
Detach the volume from the (now shut-off) instance. Once detached, open
the action menu again and select Upload to Image. Provide an image
name and choose the disk format appropriate for your storage backend
(for example, QCOW2 for file-based backends or RAW for
Ceph-backed storage).
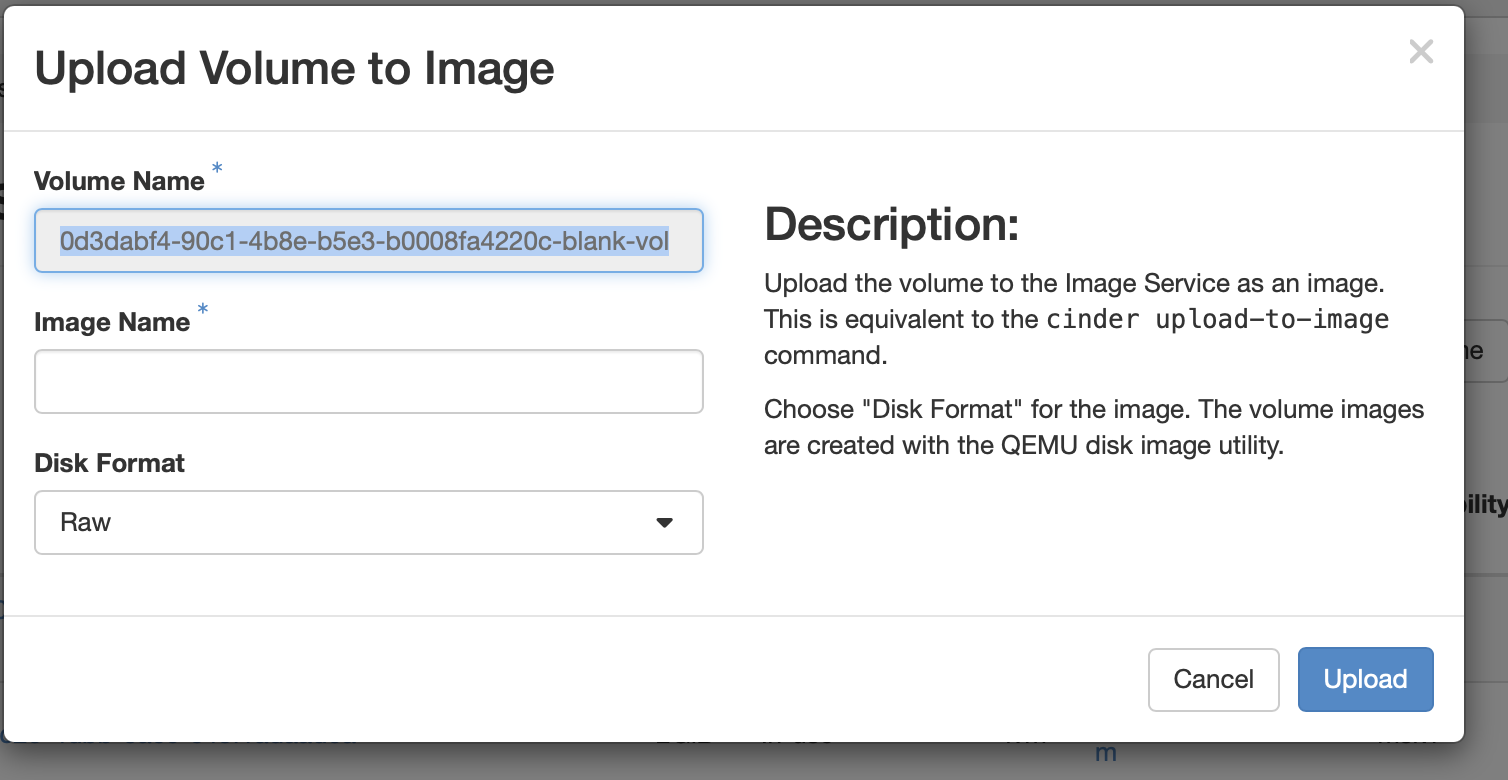
Uploading the captured volume to the Image service as a new image.
Click Upload and wait for the operation to complete; Glance reports
the image status as queued, then saving, and finally active.
This can take several minutes depending on volume size and storage
backend performance.
The image can now be referenced directly by UUID or name in
openstack server create --image ... for any subsequent Windows
Server deployment, without repeating the manual installation steps
described in this guide.
For further tuning of Windows guests, see Windows optimization tips.
