Install OpenStack
In the previous section, we installed Juju and created a Juju controller and model. We are now going to use Juju to install OpenStack itself. There are two methods to choose from:
By individual charm. This method provides a solid understanding of how Juju works and of how OpenStack is put together. Choose this option if you have never installed OpenStack with Juju.
By charm bundle. This method provides an automated means to install OpenStack. Choose this option if you are familiar with how OpenStack is built with Juju.
The current page is devoted to method #1. See Install OpenStack from a bundle for method #2.
Important
Irrespective of install method, once the cloud is deployed, the following management practices related to charm versions and machine series are recommended:
The entire suite of charms used to manage the cloud should be upgraded to the latest stable charm revision before any major change is made to the cloud (e.g. migrating to new charms, upgrading cloud services, upgrading machine series). See Charms upgrade for details.
The Juju machines that comprise the cloud should all be running the same series (e.g. ‘focal’ or ‘jammy’, but not a mix of the two). See Series upgrade for details.
Despite the length of this page, only two distinct Juju commands will be employed: juju deploy, and juju add-relation. You may want to review these pertinent sections of the Juju documentation before continuing:
This page will show how to install a minimal non-HA OpenStack cloud. See Infrastructure high availability for guidance on that subject.
OpenStack release
As the Overview of the Installation section states, OpenStack Yoga will be deployed atop Ubuntu 22.04 LTS (Jammy) cloud nodes. In order to achieve this the default package archive (“distro”) for the cloud nodes will be used during the install of each OpenStack application. Note that some applications are not part of the OpenStack project per se and therefore do not apply (exceptionally, Ceph applications do use this method).
See Perform the upgrade on the OpenStack Upgrade page for more details on cloud archive releases and how they are used when upgrading OpenStack.
Important
The chosen OpenStack release may impact the installation and configuration instructions. This guide assumes that OpenStack Yoga is being deployed.
Installation progress
There are many moving parts involved in a charmed OpenStack install. During much of the process there will be components that have not yet been satisfied, which will cause error-like messages to be displayed in the output of the juju status command. Do not be alarmed. Indeed, these are opportunities to learn about the interdependencies of the various pieces of software. Messages such as Missing relation and blocked will vanish once the appropriate applications and relations have been added and processed.
Tip
One convenient way to monitor the installation progress is to have command watch -n 5 -c juju status --color running in a separate terminal.
Deploy OpenStack
Assuming you have precisely followed the instructions on the Install Juju page, you should now have a Juju controller called ‘maas-controller’ and an empty Juju model called ‘openstack’. Change to that context now:
juju switch maas-controller:openstack
In the following sections, the various OpenStack components will be added to the ‘openstack’ model. Each application will be installed from the online Charmhub and many will have configuration options specified via a YAML file.
Note
You do not need to wait for a Juju command to complete before issuing further ones. However, it can be very instructive to see the effect one command has on the current state of the cloud.
Ceph OSD
The ceph-osd application is deployed to four nodes with the ceph-osd charm.
The name of the block devices backing the OSDs is dependent upon the hardware
on the nodes. All possible devices across the nodes should be given as the
value for the osd-devices option (space-separated). Here, we’ll be using
the same devices on each node: /dev/vdb and /dev/vdc. File
ceph-osd.yaml contains the configuration:
ceph-osd:
  osd-devices: /dev/vdb /dev/vdc
  source: distro
To deploy the application we’ll make use of the ‘compute’ tag that we placed on each of these nodes on the Install MAAS page:
juju deploy -n 4 --series jammy --channel quincy/stable --config ceph-osd.yaml --constraints tags=compute ceph-osd
If a message from a ceph-osd unit like “Non-pristine devices detected” appears
in the output of juju status you will need to use actions
zap-disk and add-disk that come with the ceph-osd charm. The
zap-disk action is destructive in nature. Only use it if you want to purge
the disk of all data and signatures for use by Ceph.
Note
Since ceph-osd was deployed on four nodes and there are only four nodes available in this environment, the usage of the ‘compute’ tag is not strictly necessary. A tag can help if there are a surplus of nodes however.
Nova Compute
The nova-compute application is deployed to three nodes with the
nova-compute charm. File nova-compute.yaml contains the configuration:
nova-compute:
  config-flags: default_ephemeral_format=ext4
  enable-live-migration: true
  enable-resize: true
  migration-auth-type: ssh
  virt-type: qemu
  openstack-origin: distro
The nodes must be targeted by machine ID since there are no more free Juju machines (MAAS nodes) available. This means we’re placing multiple services on our nodes. We’ve chosen machines 1, 2, and 3. To deploy:
juju deploy -n 3 --to 1,2,3 --series jammy --channel yoga/stable --config nova-compute.yaml nova-compute
Note
The ‘nova-compute’ charm is designed to support one image format type per
application at any given time. Changing format (see charm option
libvirt-image-backend) while existing instances are using the prior
format will require manual image conversion for each instance. See bug LP
#1826888.
MySQL InnoDB Cluster
MySQL InnoDB Cluster always requires at least three database units. They will be containerised on machines 0, 1, and 2. To deploy:
juju deploy -n 3 --to lxd:0,lxd:1,lxd:2 --series jammy --channel 8.0/stable mysql-innodb-cluster
Vault
Vault is necessary for managing the TLS certificates that will enable encrypted communication between cloud applications. It will be containerised on machine 3. To deploy:
juju deploy --to lxd:3 --series jammy --channel 1.7/stable vault
This is the first application to be joined with the cloud database that was set up in the previous section. The process is:
create an application-specific instance of mysql-router (a subordinate)
add a relation between the mysql-router instance and the database
add a relation between the mysql-router instance and the application
The combination of steps 2 and 3 joins the application to the cloud database.
Here are the corresponding commands for Vault:
juju deploy --channel 8.0/stable mysql-router vault-mysql-router
juju add-relation vault-mysql-router:db-router mysql-innodb-cluster:db-router
juju add-relation vault-mysql-router:shared-db vault:shared-db
Vault must now be initialised and unsealed. The vault charm will also need to be authorised to carry out certain tasks. These steps are covered in the vault charm documentation. Perform them now.
Provide Vault with a CA certificate so it can issue certificates to cloud API services. This is covered on the Managing TLS certificates page. Do this now.
Once the above is completed the Unit section output to command juju status should look similar to this:
Unit                     Workload  Agent  Machine  Public address  Ports     Message
ceph-osd/0               blocked   idle   0        10.0.0.160                Missing relation: monitor
ceph-osd/1*              blocked   idle   1        10.0.0.159                Missing relation: monitor
ceph-osd/2               blocked   idle   2        10.0.0.162                Missing relation: monitor
ceph-osd/3               blocked   idle   3        10.0.0.161                Missing relation: monitor
mysql-innodb-cluster/0*  active    idle   0/lxd/0  10.0.0.163                Unit is ready: Mode: R/W, Cluster is ONLINE and can tolerate up to ONE failure.
mysql-innodb-cluster/1   active    idle   1/lxd/0  10.0.0.164                Unit is ready: Mode: R/O, Cluster is ONLINE and can tolerate up to ONE failure.
mysql-innodb-cluster/2   active    idle   2/lxd/0  10.0.0.165                Unit is ready: Mode: R/O, Cluster is ONLINE and can tolerate up to ONE failure.
nova-compute/0*          blocked   idle   1        10.0.0.159                Missing relations: image, messaging
nova-compute/1           blocked   idle   2        10.0.0.162                Missing relations: messaging, image
nova-compute/2           blocked   idle   3        10.0.0.161                Missing relations: image, messaging
vault/0*                 active    idle   3/lxd/0  10.0.0.166      8200/tcp  Unit is ready (active: true, mlock: disabled)
  vault-mysql-router/0*  active    idle            10.0.0.166                Unit is ready
Cloud applications are TLS-enabled via the vault:certificates relation.
Below we start with the cloud database. Although the latter has a self-signed
certificate, it is recommended to use the one signed by Vault’s CA:
juju add-relation mysql-innodb-cluster:certificates vault:certificates
Neutron networking
Neutron networking is implemented with four applications:
neutron-api
neutron-api-plugin-ovn (subordinate)
ovn-central
ovn-chassis (subordinate)
File neutron.yaml contains the configuration necessary for three of them:
ovn-chassis:
  bridge-interface-mappings: br-ex:enp1s0
  ovn-bridge-mappings: physnet1:br-ex
neutron-api:
  neutron-security-groups: true
  flat-network-providers: physnet1
  openstack-origin: distro
ovn-central:
  source: distro
The bridge-interface-mappings setting impacts the OVN Chassis and refers to
a mapping of OVS bridge to network interface. As described in the Create
OVS bridge section on the Install MAAS
page, it is ‘br-ex:enp1s0’.
The flat-network-providers setting enables the Neutron flat network
provider used in this example scenario and gives it the name of ‘physnet1’. The
flat network provider and its name will be referenced when we Set up
public networking on the next page.
The ovn-bridge-mappings setting maps the data-port interface to the flat
network provider.
The main OVN application is ovn-central and it requires at least three units. They will be containerised on machines 0, 1, and 2. To deploy:
juju deploy -n 3 --to lxd:0,lxd:1,lxd:2 --series jammy --channel 22.03/stable --config neutron.yaml ovn-central
The neutron-api application will be containerised on machine 1:
juju deploy --to lxd:1 --series jammy --channel yoga/stable --config neutron.yaml neutron-api
Deploy the subordinate charm applications:
juju deploy --channel yoga/stable neutron-api-plugin-ovn
juju deploy --channel 22.03/stable --config neutron.yaml ovn-chassis
Add the necessary relations:
juju add-relation neutron-api-plugin-ovn:neutron-plugin neutron-api:neutron-plugin-api-subordinate
juju add-relation neutron-api-plugin-ovn:ovsdb-cms ovn-central:ovsdb-cms
juju add-relation ovn-chassis:ovsdb ovn-central:ovsdb
juju add-relation ovn-chassis:nova-compute nova-compute:neutron-plugin
juju add-relation neutron-api:certificates vault:certificates
juju add-relation neutron-api-plugin-ovn:certificates vault:certificates
juju add-relation ovn-central:certificates vault:certificates
juju add-relation ovn-chassis:certificates vault:certificates
Join neutron-api to the cloud database:
juju deploy --channel 8.0/stable mysql-router neutron-api-mysql-router
juju add-relation neutron-api-mysql-router:db-router mysql-innodb-cluster:db-router
juju add-relation neutron-api-mysql-router:shared-db neutron-api:shared-db
Keystone
The keystone application will be containerised on machine 0 with the keystone charm. To deploy:
juju deploy --to lxd:0 --series jammy --channel yoga/stable keystone
Join keystone to the cloud database:
juju deploy --channel 8.0/stable mysql-router keystone-mysql-router
juju add-relation keystone-mysql-router:db-router mysql-innodb-cluster:db-router
juju add-relation keystone-mysql-router:shared-db keystone:shared-db
Two additional relations can be added at this time:
juju add-relation keystone:identity-service neutron-api:identity-service
juju add-relation keystone:certificates vault:certificates
RabbitMQ
The rabbitmq-server application will be containerised on machine 2 with the rabbitmq-server charm. To deploy:
juju deploy --to lxd:2 --series jammy --channel 3.9/stable rabbitmq-server
Two relations can be added at this time:
juju add-relation rabbitmq-server:amqp neutron-api:amqp
juju add-relation rabbitmq-server:amqp nova-compute:amqp
At this time the Unit section output to command juju status should look similar to this:
Unit                           Workload  Agent  Machine  Public address  Ports               Message
ceph-osd/0                     blocked   idle   0        10.0.0.160                          Missing relation: monitor
ceph-osd/1*                    blocked   idle   1        10.0.0.159                          Missing relation: monitor
ceph-osd/2                     blocked   idle   2        10.0.0.162                          Missing relation: monitor
ceph-osd/3                     blocked   idle   3        10.0.0.161                          Missing relation: monitor
keystone/0*                    active    idle   0/lxd/3  10.0.0.174      5000/tcp            Unit is ready
  keystone-mysql-router/0*     active    idle            10.0.0.174                          Unit is ready
mysql-innodb-cluster/0*        active    idle   0/lxd/0  10.0.0.163                          Unit is ready: Mode: R/O, Cluster is ONLINE and can tolerate up to ONE failure.
mysql-innodb-cluster/1         active    idle   1/lxd/0  10.0.0.164                          Unit is ready: Mode: R/W, Cluster is ONLINE and can tolerate up to ONE failure.
mysql-innodb-cluster/2         active    idle   2/lxd/0  10.0.0.165                          Unit is ready: Mode: R/O, Cluster is ONLINE and can tolerate up to ONE failure.
neutron-api/0*                 active    idle   1/lxd/3  10.0.0.173      9696/tcp            Unit is ready
  neutron-api-mysql-router/0*  active    idle            10.0.0.173                          Unit is ready
  neutron-api-plugin-ovn/0*    blocked   idle            10.0.0.173                          'certificates' missing
nova-compute/0*                blocked   idle   1        10.0.0.159                          Missing relations: image
  ovn-chassis/0*               active    idle            10.0.0.159                          Unit is ready
nova-compute/1                 blocked   idle   2        10.0.0.162                          Missing relations: image
  ovn-chassis/2                active    idle            10.0.0.162                          Unit is ready
nova-compute/2                 blocked   idle   3        10.0.0.161                          Missing relations: image
  ovn-chassis/1                active    idle            10.0.0.161                          Unit is ready
ovn-central/3                  active    idle   0/lxd/2  10.0.0.170      6641/tcp,6642/tcp   Unit is ready
ovn-central/4                  active    idle   1/lxd/2  10.0.0.171      6641/tcp,6642/tcp   Unit is ready (northd: active)
ovn-central/5*                 active    idle   2/lxd/2  10.0.0.172      6641/tcp,6642/tcp   Unit is ready (leader: ovnnb_db, ovnsb_db)
rabbitmq-server/0*             active    idle   2/lxd/3  10.0.0.175      5672/tcp,15672/tcp  Unit is ready
vault/0*                       active    idle   3/lxd/0  10.0.0.166      8200/tcp            Unit is ready (active: true, mlock: disabled)
  vault-mysql-router/0*        active    idle            10.0.0.166                          Unit is ready
Nova cloud controller
The nova-cloud-controller application, which includes nova-scheduler, nova-api,
and nova-conductor services, will be containerised on machine 3 with the
nova-cloud-controller charm. File ncc.yaml contains the configuration:
nova-cloud-controller:
  network-manager: Neutron
  openstack-origin: distro
To deploy:
juju deploy --to lxd:3 --series jammy --channel yoga/stable --config ncc.yaml nova-cloud-controller
Join nova-cloud-controller to the cloud database:
juju deploy --channel 8.0/stable mysql-router ncc-mysql-router
juju add-relation ncc-mysql-router:db-router mysql-innodb-cluster:db-router
juju add-relation ncc-mysql-router:shared-db nova-cloud-controller:shared-db
Note
To keep juju status output compact the expected
nova-cloud-controller-mysql-router application name has been shortened
to ncc-mysql-router.
Five additional relations can be added at this time:
juju add-relation nova-cloud-controller:identity-service keystone:identity-service
juju add-relation nova-cloud-controller:amqp rabbitmq-server:amqp
juju add-relation nova-cloud-controller:neutron-api neutron-api:neutron-api
juju add-relation nova-cloud-controller:cloud-compute nova-compute:cloud-compute
juju add-relation nova-cloud-controller:certificates vault:certificates
Placement
The placement application will be containerised on machine 3 with the placement charm. To deploy:
juju deploy --to lxd:3 --series jammy --channel yoga/stable placement
Join placement to the cloud database:
juju deploy --channel 8.0/stable mysql-router placement-mysql-router
juju add-relation placement-mysql-router:db-router mysql-innodb-cluster:db-router
juju add-relation placement-mysql-router:shared-db placement:shared-db
Three additional relations can be added at this time:
juju add-relation placement:identity-service keystone:identity-service
juju add-relation placement:placement nova-cloud-controller:placement
juju add-relation placement:certificates vault:certificates
OpenStack dashboard
The openstack-dashboard application (Horizon) will be containerised on machine 2 with the openstack-dashboard charm. To deploy:
juju deploy --to lxd:2 --series jammy --channel yoga/stable openstack-dashboard
Join openstack-dashboard to the cloud database:
juju deploy --channel 8.0/stable mysql-router dashboard-mysql-router
juju add-relation dashboard-mysql-router:db-router mysql-innodb-cluster:db-router
juju add-relation dashboard-mysql-router:shared-db openstack-dashboard:shared-db
Note
To keep juju status output compact the expected
openstack-dashboard-mysql-router application name has been shortened to
dashboard-mysql-router.
Two additional relations are required:
juju add-relation openstack-dashboard:identity-service keystone:identity-service
juju add-relation openstack-dashboard:certificates vault:certificates
Glance
The glance application will be containerised on machine 3 with the glance charm. To deploy:
juju deploy --to lxd:3 --series jammy --channel yoga/stable glance
Join glance to the cloud database:
juju deploy --channel 8.0/stable mysql-router glance-mysql-router
juju add-relation glance-mysql-router:db-router mysql-innodb-cluster:db-router
juju add-relation glance-mysql-router:shared-db glance:shared-db
Four additional relations can be added at this time:
juju add-relation glance:image-service nova-cloud-controller:image-service
juju add-relation glance:image-service nova-compute:image-service
juju add-relation glance:identity-service keystone:identity-service
juju add-relation glance:certificates vault:certificates
At this time the Unit section output to command juju status should look similar to this:
Unit                           Workload  Agent  Machine  Public address  Ports               Message
ceph-osd/0                     blocked   idle   0        10.0.0.160                          Missing relation: monitor
ceph-osd/1*                    blocked   idle   1        10.0.0.159                          Missing relation: monitor
ceph-osd/2                     blocked   idle   2        10.0.0.162                          Missing relation: monitor
ceph-osd/3                     blocked   idle   3        10.0.0.161                          Missing relation: monitor
glance/0*                      active    idle   3/lxd/3  10.0.0.179      9292/tcp            Unit is ready
  glance-mysql-router/0*       active    idle            10.0.0.179                          Unit is ready
keystone/0*                    active    idle   0/lxd/3  10.0.0.174      5000/tcp            Unit is ready
  keystone-mysql-router/0*     active    idle            10.0.0.174                          Unit is ready
mysql-innodb-cluster/0*        active    idle   0/lxd/0  10.0.0.163                          Unit is ready: Mode: R/O, Cluster is ONLINE and can tolerate up to ONE failure.
mysql-innodb-cluster/1         active    idle   1/lxd/0  10.0.0.164                          Unit is ready: Mode: R/W, Cluster is ONLINE and can tolerate up to ONE failure.
mysql-innodb-cluster/2         active    idle   2/lxd/0  10.0.0.165                          Unit is ready: Mode: R/O, Cluster is ONLINE and can tolerate up to ONE failure.
neutron-api/0*                 active    idle   1/lxd/3  10.0.0.173      9696/tcp            Unit is ready
  neutron-api-mysql-router/0*  active    idle            10.0.0.173                          Unit is ready
  neutron-api-plugin-ovn/0*    active    idle            10.0.0.173                          Unit is ready
nova-cloud-controller/0*       active    idle   3/lxd/1  10.0.0.176      8774/tcp,8775/tcp   Unit is ready
  ncc-mysql-router/0*          active    idle            10.0.0.176                          Unit is ready
nova-compute/0*                active    idle   1        10.0.0.159                          Unit is ready
  ovn-chassis/0*               active    idle            10.0.0.159                          Unit is ready
nova-compute/1                 active    idle   2        10.0.0.162                          Unit is ready
  ovn-chassis/2                active    idle            10.0.0.162                          Unit is ready
nova-compute/2                 active    idle   3        10.0.0.161                          Unit is ready
  ovn-chassis/1                active    idle            10.0.0.161                          Unit is ready
openstack-dashboard/0*         active    idle   2/lxd/4  10.0.0.178      80/tcp,443/tcp      Unit is ready
  dashboard-mysql-router/0*    active    idle            10.0.0.178                          Unit is ready
ovn-central/3                  active    idle   0/lxd/2  10.0.0.170      6641/tcp,6642/tcp   Unit is ready
ovn-central/4                  active    idle   1/lxd/2  10.0.0.171      6641/tcp,6642/tcp   Unit is ready (northd: active)
ovn-central/5*                 active    idle   2/lxd/2  10.0.0.172      6641/tcp,6642/tcp   Unit is ready (leader: ovnnb_db, ovnsb_db)
placement/0*                   active    idle   3/lxd/2  10.0.0.177      8778/tcp            Unit is ready
  placement-mysql-router/0*    active    idle            10.0.0.177                          Unit is ready
rabbitmq-server/0*             active    idle   2/lxd/3  10.0.0.175      5672/tcp,15672/tcp  Unit is ready
vault/0*                       active    idle   3/lxd/0  10.0.0.166      8200/tcp            Unit is ready (active: true, mlock: disabled)
  vault-mysql-router/0*        active    idle            10.0.0.166                          Unit is ready
Ceph monitor
The ceph-mon application will be containerised on machines 0, 1, and 2 with the
ceph-mon charm. File ceph-mon.yaml contains the configuration:
ceph-mon:
  expected-osd-count: 4
  monitor-count: 3
  source: distro
To deploy:
juju deploy -n 3 --to lxd:0,lxd:1,lxd:2 --series jammy --channel quincy/stable --config ceph-mon.yaml ceph-mon
Three relations can be added at this time:
juju add-relation ceph-mon:osd ceph-osd:mon
juju add-relation ceph-mon:client nova-compute:ceph
juju add-relation ceph-mon:client glance:ceph
For the above relations,
The nova-compute:ceph relation makes Ceph the storage backend for Nova non-bootable disk images. The nova-compute charm option
libvirt-image-backendmust be set to ‘rbd’ for this to take effect.The
glance:cephrelation makes Ceph the storage backend for Glance.
Cinder
The cinder application will be containerised on machine 1 with the cinder
charm. File cinder.yaml contains the configuration:
cinder:
  block-device: None
  glance-api-version: 2
  openstack-origin: distro
To deploy:
juju deploy --to lxd:1 --series jammy --channel yoga/stable --config cinder.yaml cinder
Join cinder to the cloud database:
juju deploy --channel 8.0/stable mysql-router cinder-mysql-router
juju add-relation cinder-mysql-router:db-router mysql-innodb-cluster:db-router
juju add-relation cinder-mysql-router:shared-db cinder:shared-db
Five additional relations can be added at this time:
juju add-relation cinder:cinder-volume-service nova-cloud-controller:cinder-volume-service
juju add-relation cinder:identity-service keystone:identity-service
juju add-relation cinder:amqp rabbitmq-server:amqp
juju add-relation cinder:image-service glance:image-service
juju add-relation cinder:certificates vault:certificates
The above glance:image-service relation will enable Cinder to consume the
Glance API (e.g. making Cinder able to perform volume snapshots of Glance
images).
Like Glance, Cinder will use Ceph as its storage backend (hence block-device:
None in the configuration file). This will be implemented via the
cinder-ceph subordinate charm:
juju deploy --channel yoga/stable cinder-ceph
Three relations need to be added:
juju add-relation cinder-ceph:storage-backend cinder:storage-backend
juju add-relation cinder-ceph:ceph ceph-mon:client
juju add-relation cinder-ceph:ceph-access nova-compute:ceph-access
Ceph RADOS Gateway
The Ceph RADOS Gateway will be deployed to offer an S3 and Swift compatible HTTP gateway. This is an alternative to using OpenStack Swift.
The ceph-radosgw application will be containerised on machine 0 with the ceph-radosgw charm. To deploy:
juju deploy --to lxd:0 --series jammy --channel quincy/stable ceph-radosgw
A single relation is needed:
juju add-relation ceph-radosgw:mon ceph-mon:radosgw
Final results and dashboard access
Once all the applications have been deployed and the relations between them have been added we need to wait for the output of juju status to settle. The final results should be devoid of any error-like messages. Example output (including relations) for a successful cloud deployment is given here.
One milestone in the deployment of OpenStack is the first login to the Horizon dashboard. You will need its IP address and the admin password.
Obtain the address in this way:
juju status --format=yaml openstack-dashboard | grep public-address | awk '{print $2}' | head -1
In this example, the address is ‘10.0.0.178’.
The password can be queried from Keystone:
juju run --unit keystone/leader leader-get admin_passwd
The dashboard URL then becomes:
http://10.0.0.178/horizon
The final credentials needed to log in are:
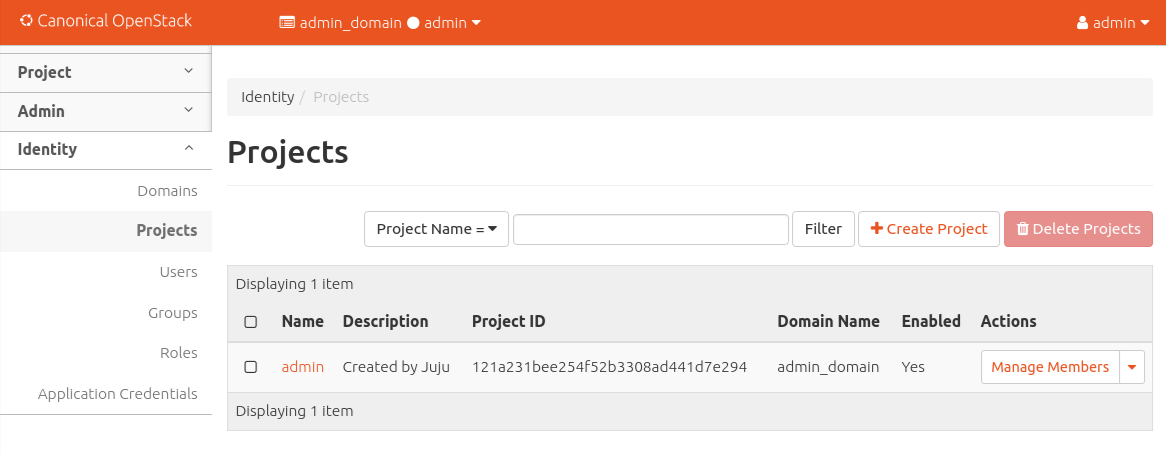
Once logged in you should see something like this:
VM consoles
Enable a remote access protocol such as novnc (or spice) if you want to connect to VM consoles from within the dashboard:
juju config nova-cloud-controller console-access-protocol=novnc
Next steps
You have successfully deployed OpenStack using Juju and MAAS. The next step is to render the cloud functional for users. This will involve setting up networks, images, and a user environment. Go to Configure OpenStack now.
